
Designs
Organizing the designs
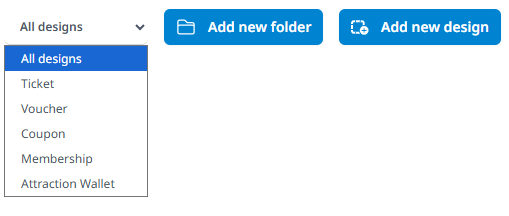
In the upper right corner it is possible to create new designs, new folders or do a quick filtering of designs. Quick filter filters list according to design type.
Designs can be further organized by creating folders and dividing designs accordingly.
Design types and dynamic data
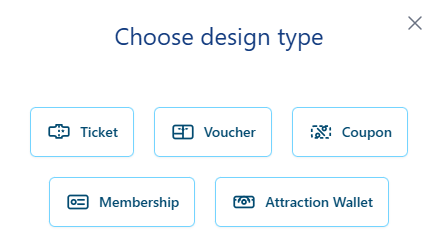
Choose the design type that matches the product you are designing. The type determines which dynamic fields are available and where the design can be selected in Business Central. A Ticket design exposes ticket fields and is selected in the ticket setup; a Voucher design exposes voucher fields and is selected on a retail voucher type.
Static text stays the same for each product. Dynamic fields are replaced with values for the actual product when it is rendered. For example, {{ ticketNumber }} displays a ticket number, while {{ initialAmount }} displays a voucher’s initial amount.
Inside a text box, type {{ to open the available field list. Select the field you need. The list contains fields relevant to the selected design type only. Use the picker to insert the expression rather than guessing a field name. If dynamic data should be added in between text it might be necessary to add {{}} and place the cursor in the middle in order to have the available field list appear.
A field can only display data that exists for the issued product. Verify dynamic values using an actual generated product; an editor view alone does not confirm that the Business Central data is present.
Language versions
A design can have multiple language versions. After creating the first version, select another language in the editor. The existing design is copied so you can translate its text and adjust the layout for that language. NaviPartner recommends finishing the first language version of the design completely before creating the next language version to make the process easier.
Under Settings menu, configure the organization’s default language and the additional languages available for design versions. Selecting an available language does not translate a design automatically; you must create and review its content.
For an online purchase, the requested language comes from the order imported from the webshop. When tickets are created manually in Business Central, a language code can be specified during creation. If no language is supplied, or the requested version is unavailable, the default language configured in NP Designer is used. Default language should also be setup in Business Central on the page ‘Ticket Setup’ under the section ‘Ticket Print’ in the field called ‘Default Language Code’.
Date and time display is configured in the organization’s Date & Time Settings. Test the resulting values as well as the translated text in each required language.
Draft and finalized designs
Design status controls which connection can use a design in Business Central. The following rules describe the current behavior.
A Draft design can only be used in the Business Central environment connected through the prelive API. A Finalized design can only be used in the environment connected through the production API. Under this behavior, finalized designs are not available through the prelive connection.
The design tools and setup procedure are the same in sandbox and production. Use the status that matches the connection. Saving a design does not confirm that its Business Central mapping, language, data, or delivery has been tested.