
Set up ticket dynamic pricing in Shopify
Shopify app ticket setup
After installing the application, enter the required configuration parameters:
- Tenant ID
- Business Central (BC) environment
- Company
Click Save Connection Info and verify that the BC connection status is marked as “Connected” (green indicator):
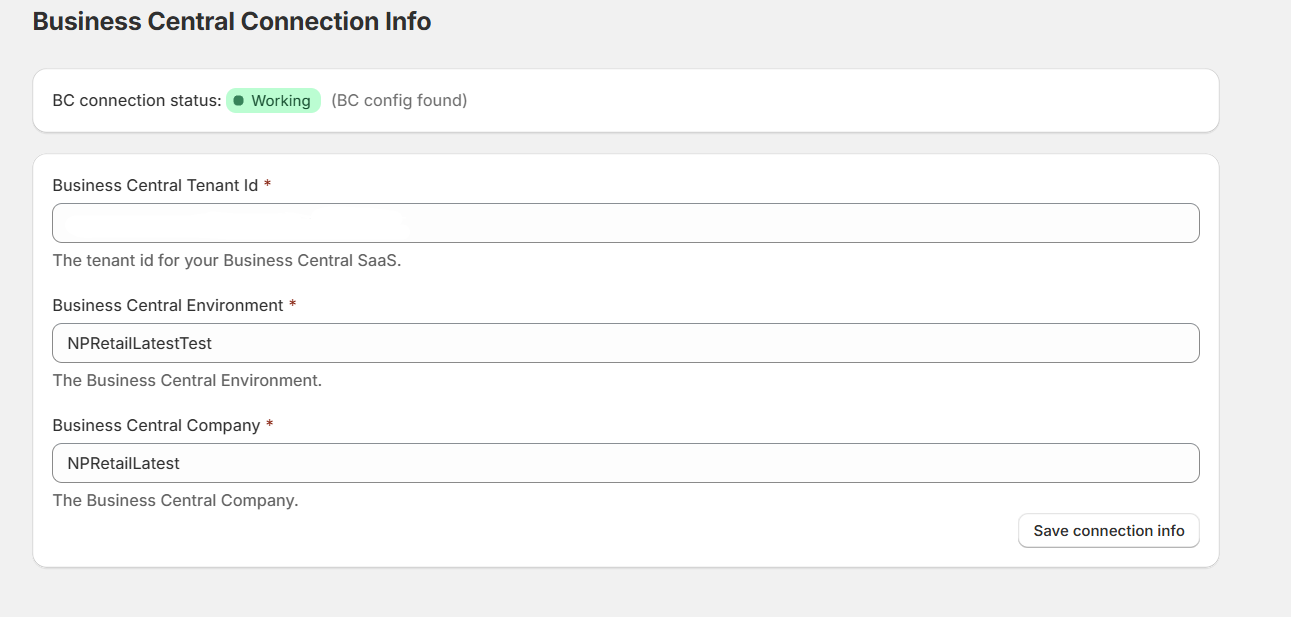
Note: Sometimes you have to reload the page to make sure it’s connected.
Adding first ticket product
-
Navigate to Products from the main sidebar menu:
-
Click Add Product and fill in the required product details (e.g. name, description, price, etc.).
-
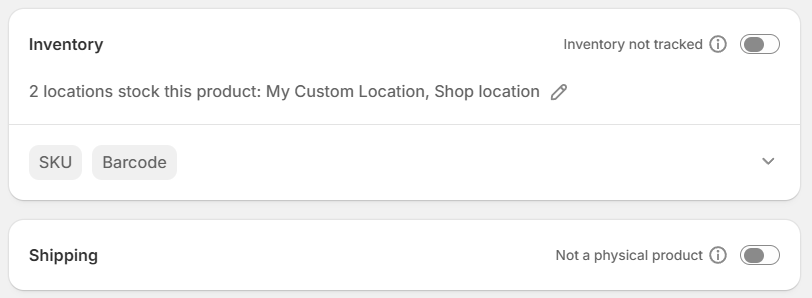
Ensure the following configuration is applied:
- Inventory tracking: Disabled (Not tracked)
- Product type: Non-physical product
-
In the SKU field, enter the Ticket Item Number retrieved from Business Central:

Once completed, the ticket product is ready to be assigned to a ticket collection or used as a standalone product on a product page.
Dynamic Pricing Setup
-
Navigate to the Ticket App from the sidebar and open Settings:
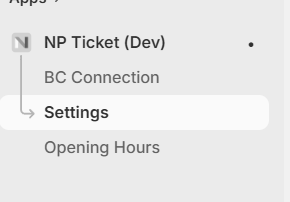
-
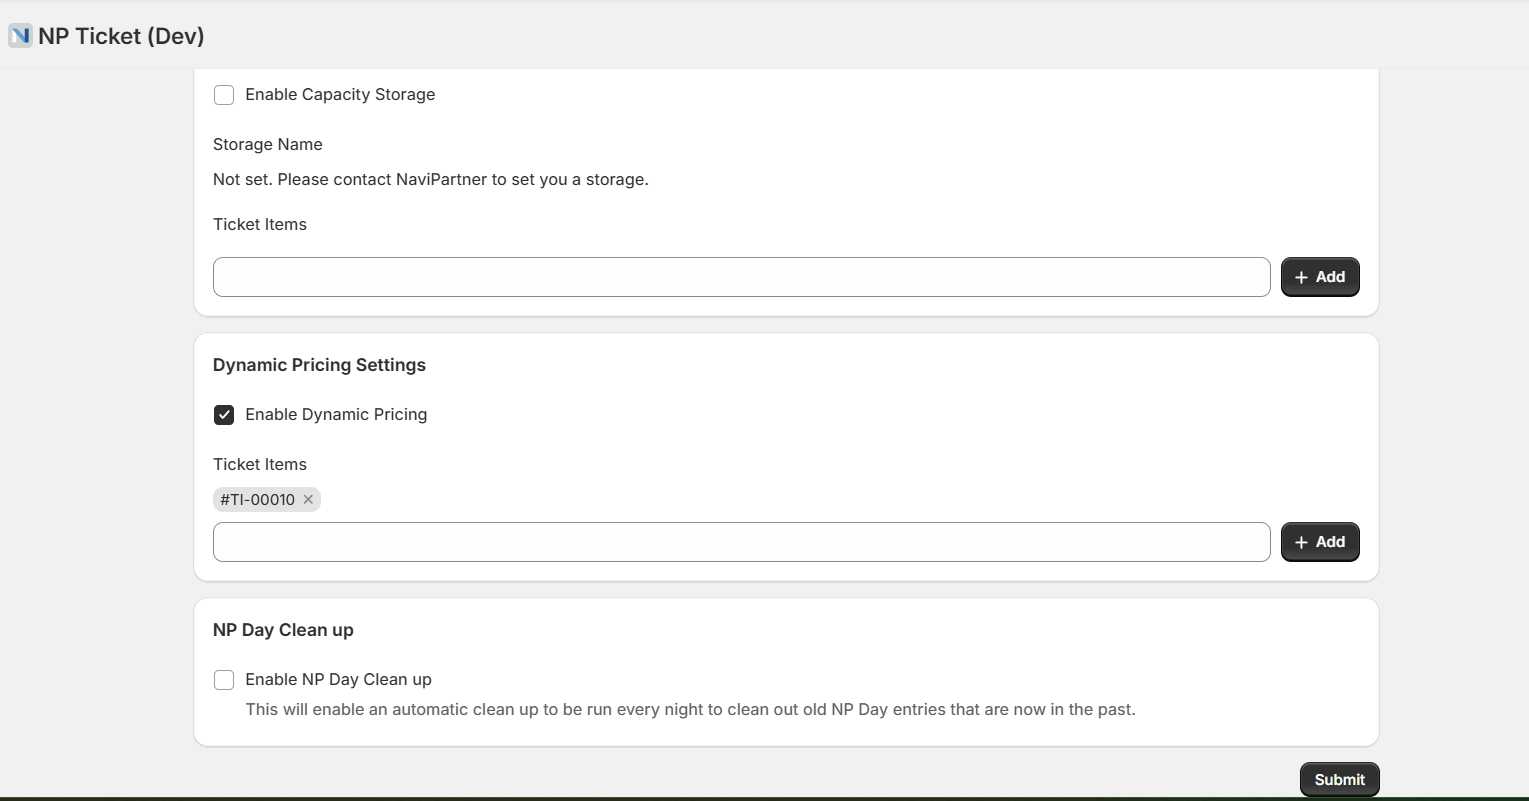
Within the Dynamic Pricing Settings section:
- Enable Dynamic Pricing
- Add the ticket product using its SKU
- After configuration, click Submit.
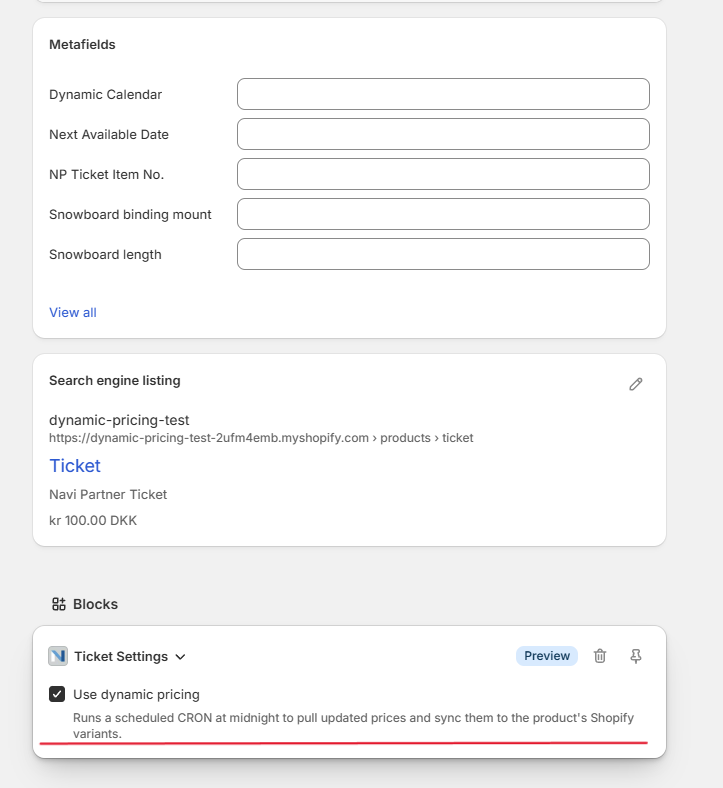
Alternatively, navigate to Products → Ticket, scroll all the way down, and click “Use Dynamic Pricing” in the Blocks section for the relevant product:
-
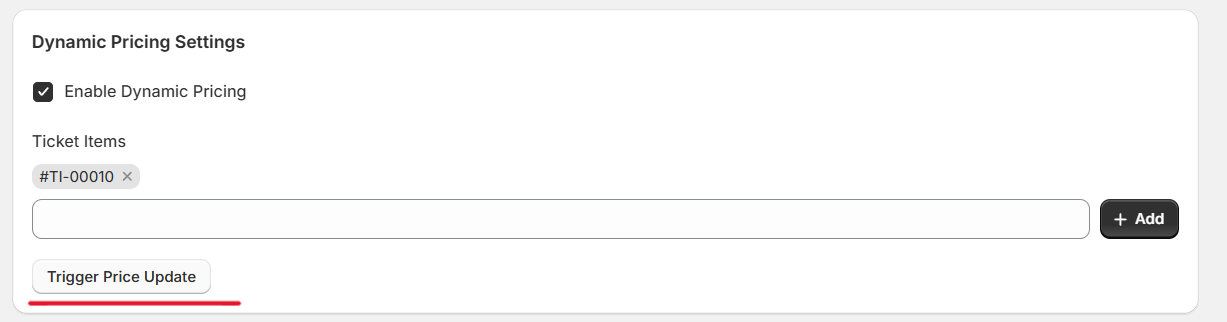
After submitting the dynamic ticket configuration, select Trigger Price Update:
-
Click Trigger:
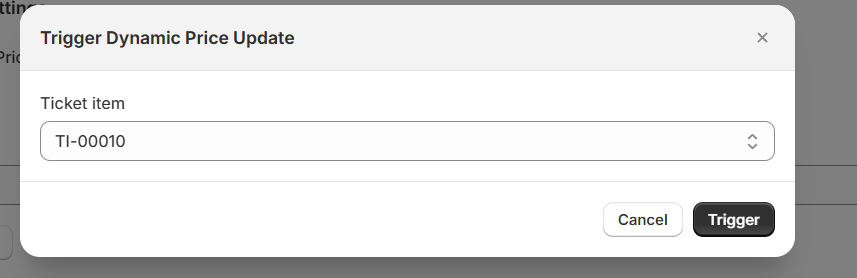
Note: Ticket prices are automatically synchronized with Business Central every 24 hours. For immediate synchronization, manual triggering is required.
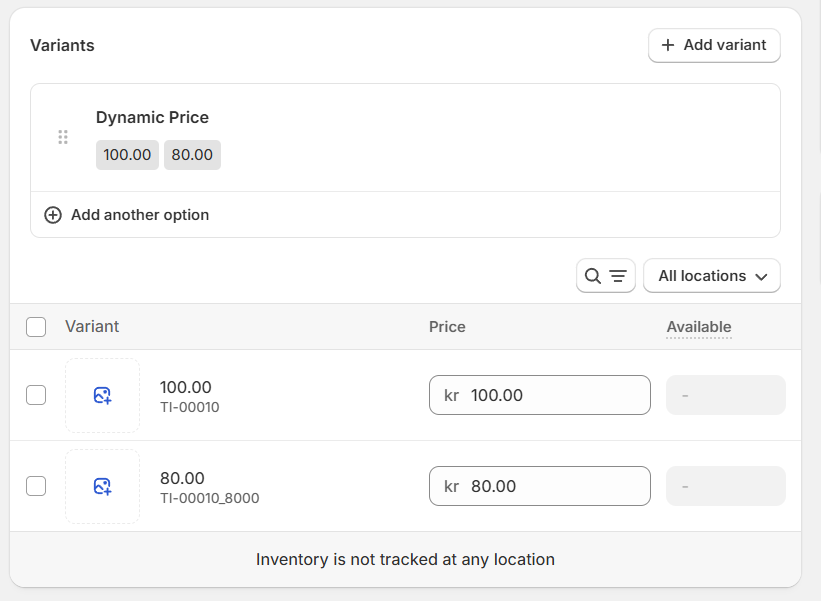
Verifying Updated Variants
-
Navigate to the Products section and open the relevant ticket product.
-
Confirm that newly generated variants are present.
-
Ensure that the variants match the pricing profiles defined in Business Central:
Pricing Profiles Configuration
-
In Shopify Admin, navigate to Content → Metaobjects from the sidebar menu:

-
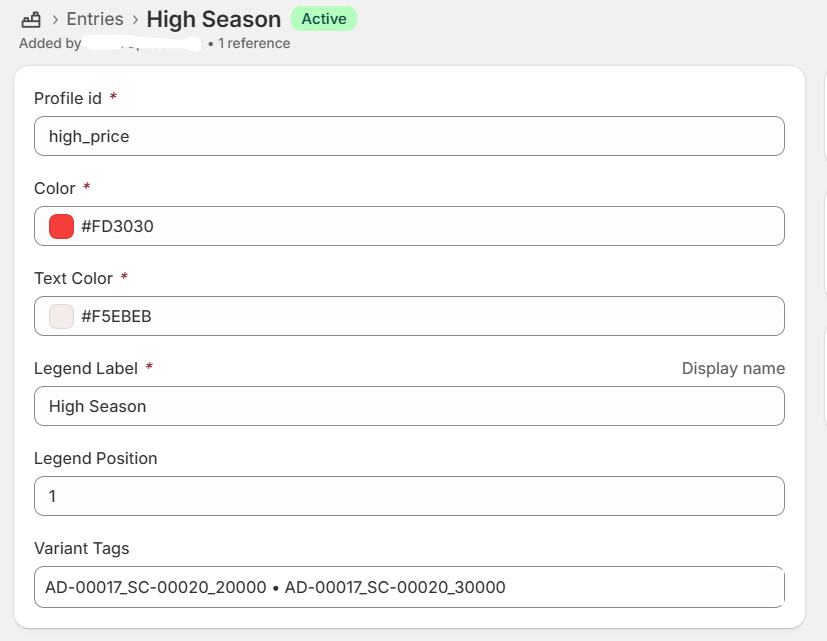
Open Ticket Dynamic Pricing Profile:

-
Click Add Entry and create a custom pricing profile:
-
For each profile, you can define:
- Calendar tile color
- Text color
- Legend label (display name in calendar UI)
Mapping Pricing Profiles to Business Central
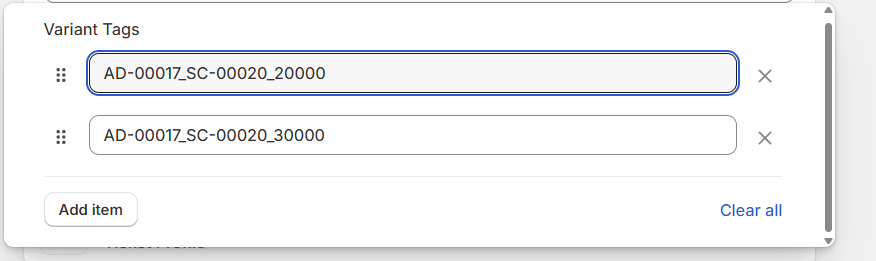
To link Shopify pricing profiles with Business Central pricing rules, configure Variant Tags accordingly:
-
Click the Variant Tags field and enter all relevant pricing profiles:
-
For the Base Price, use the Admission Code.
-
For additional pricing rules, use the following format:

-
Required values can be found in Business Central under: Ticket Item → Ticket → Pricing Profiles.