
Set up Pay by Link
The Pay by Link feature enables businesses to streamline and simplify the payment process by allowing customers to make secure online payments through a direct link.
-
Search for NP Pay Setup, and choose the related link.
-
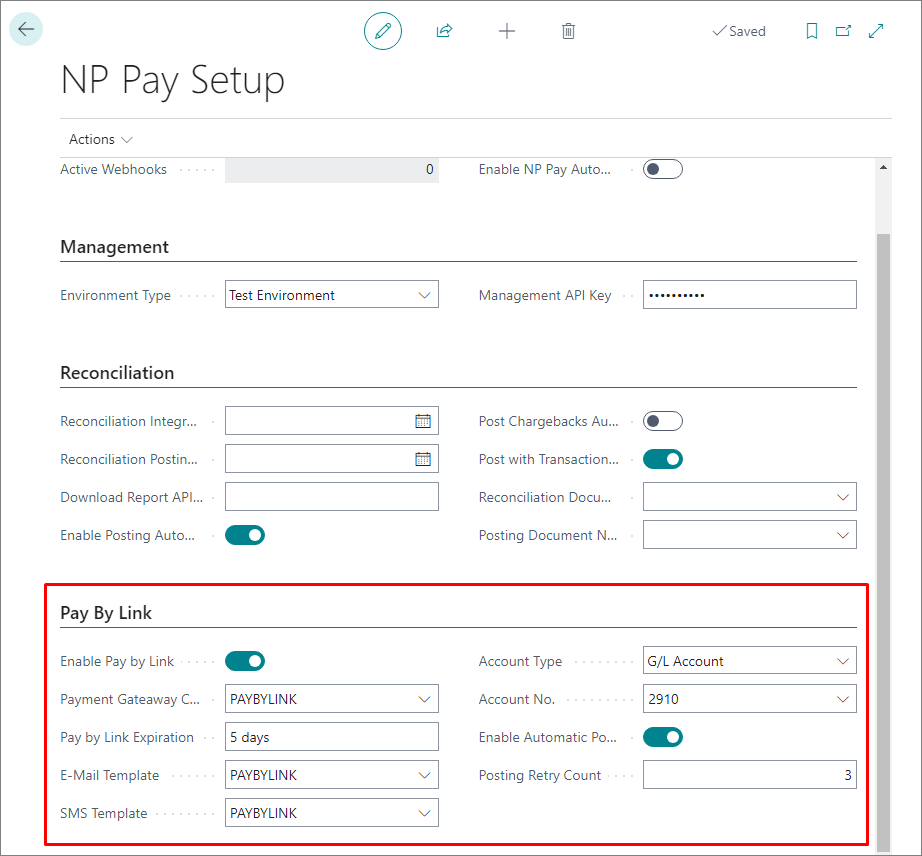
Once you’re on the NP Pay Setup, navigate to the Pay by Link panel/FastTab.
-
Use the following fields and options to complete the setup. If necessary, refer to the screenshot below for more information.
-
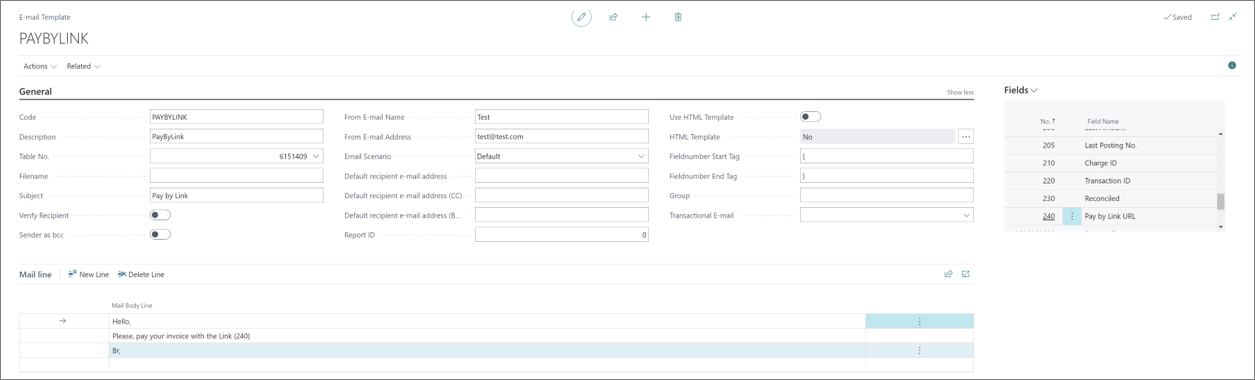
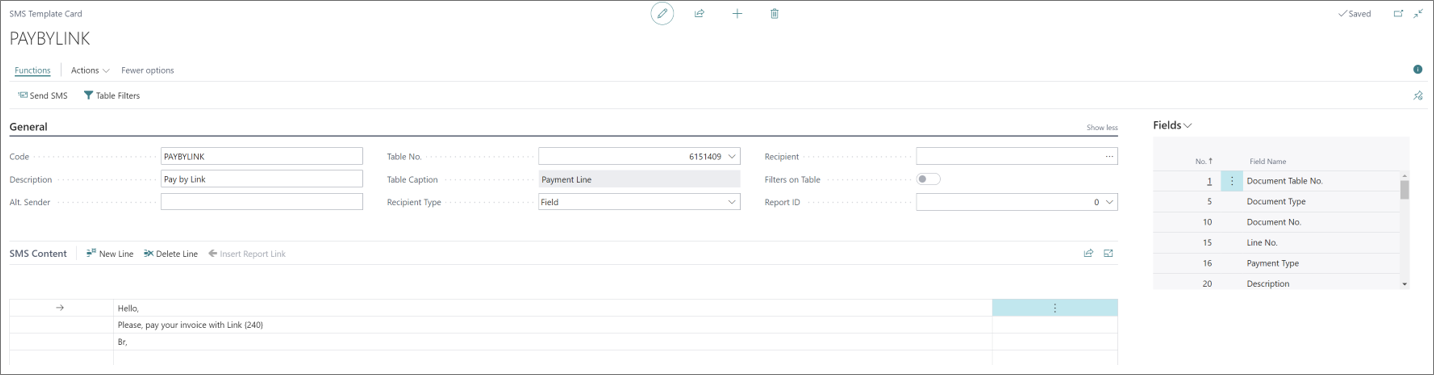
If you want to send Pay by Link via SMS or email, you need to do additional setup in either Email Setup or the SMS Setup, depending on the desired result.
-
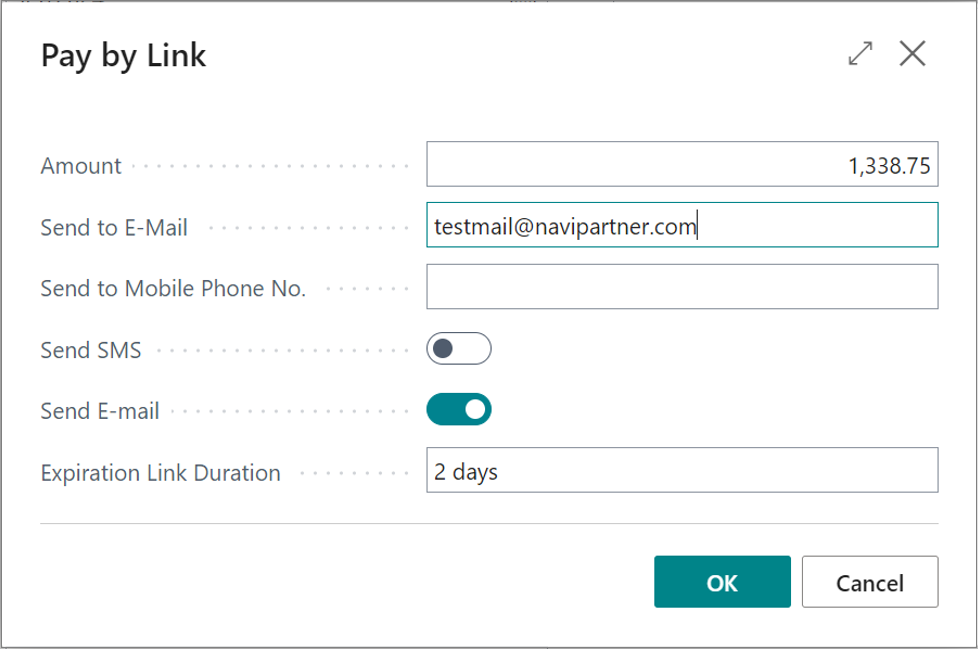
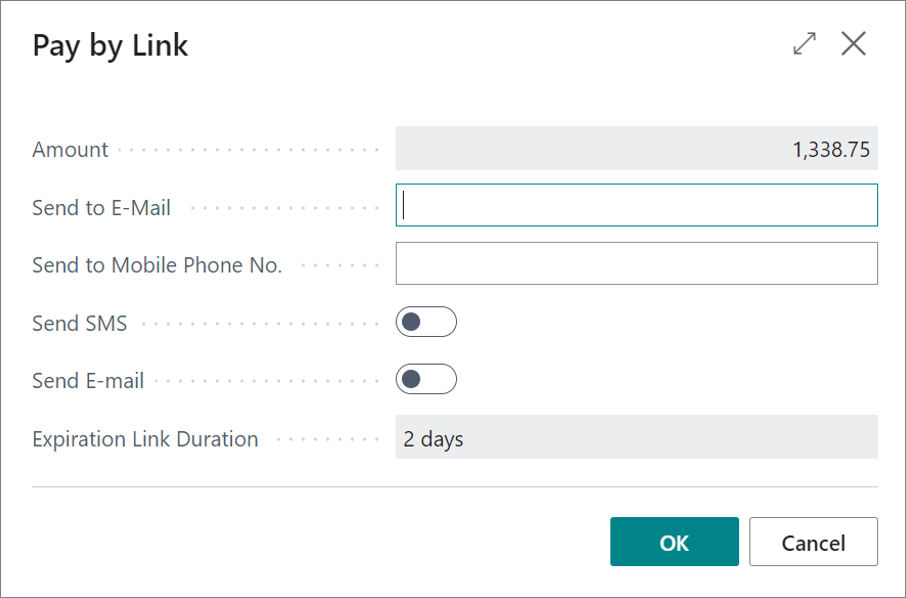
Issue Pay by Link from documents (sales order, sales invoice, posted sales invoice) by opening the Actions dropdown in the ribbon, and selecting Pay by Link.
The Pay by Link window is displayed. -
Populate the available fields and verify the automatically input information:
Interactive demo
Try out the NP Pay feature with our interactive demo:
Next steps
View the details
After creating Pay by Link, you can see the details by opening the Related dropdown from the selected document (sales order, sales invoice, posted sales invoice), and clicking Pay by Link > Payment Lines.

The following fields and options are used to define payment lines:
After authorization is completed, the Payment Lines are automatically populated with Transaction ID, Authorized Amount, and Authorization Date. Subsequently, the payment amount can either be captured automatically upon posting or triggered manually. During authorization, the corresponding amount is reserved on the customer’s credit card, and that amount is deducted from the credit card balance after the payment is captured.
Check email log
You can check the pay-by-link email log by navigating to Related > Pay by Link > Pay by Link E-mail Log from the Payment Line List. The email log allows users to view the log of emails sent for Pay by Link transactions. The log includes details such as an email address, date, and the time sent, as well as the status of the email delivery.
Resend Pay by Link
You can resend Pay by Link to customers by navigating to Related > Pay by Link > Resend Pay by Link from the Payment Line List. An identical form to the one used for generating Pay by Link previously is created as a result. The Amount and Expiry Date fields are non-editable, as the Pay by Link has already been issued.
Cancel Pay by Link
You can cancel an active Pay by Link by navigating to Related > Pay by Link > Cancels Pay by Link from the Payment Line List. Once cancelled, the link becomes invalid, and the customer is no longer able to use it to make a payment. The Manually Cancelled Link switch is activated and Expires At is changed to the current date and time.
Cancel payment
You can cancel the payment via the Cancel Payment action in the Payment Line List ribbon. This action prevents the transaction from being finalized, and ensures that no funds are transferred from the customer’s account.
View posting log
You can reach the Posting Log from the Payment Line List by clicking the appropriate action in the ribbon. It brings up a detailed log of all posting activities, including successes, errors, and retry attempts for a selected Payment Line.