> This page is for Product Documentation.
> For clean Markdown of any page, append .md to the page URL.
> For a complete documentation index, see https://docs.navipartner.com/llms.txt.
> For AI client integration (Claude Code, Cursor, etc.), connect to the MCP server at https://docs.navipartner.com/_mcp/server.
# Set up POS Security Profile
> In POS Security Profile it is possible to set up the administrator password, and the password for unlocking a POS unit after the unit has been locked due to non-activity.
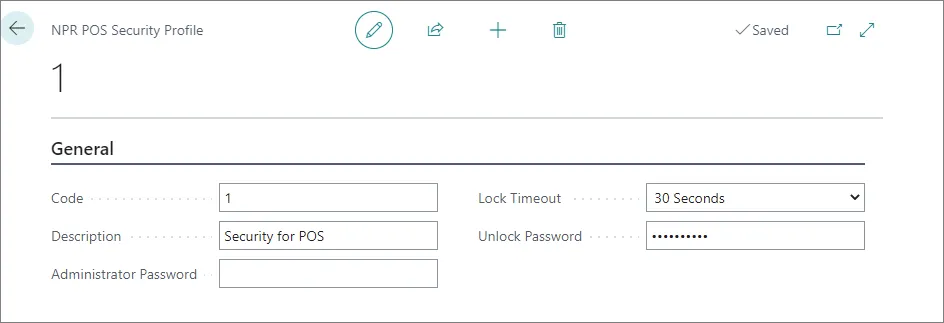
To set up the security profile, follow the provided steps:
1. In **General** insert **Code** and **Description**.\
The **Code** has to be unique for for each profile, while the **Description** field should contain a short description of the profile.
2. Provide the **Administrator Password**.\
It can be assigned to different buttons in the POS menu, so if someone presses a button, the administrator password should be provided in the pop up window.
3. Set the **Lock Timeout**, i.e. the time of non-activity after which the POS unit will be locked.
4. Provide the **Unlock Password**.\
This password will be used for unlocking the POS unit.
#### See also
* [Set up external terminal integration](/product/shipping-labels-shipmondo-setup)
* [POS processes - learn & apply](/product/retail-pos-profiles-intro)