> This page is for Product Documentation.
> For clean Markdown of any page, append .md to the page URL.
> For a complete documentation index, see https://docs.navipartner.com/llms.txt.
> For AI client integration (Claude Code, Cursor, etc.), connect to the MCP server at https://docs.navipartner.com/_mcp/server.
# Create item addons and attach them to main items
> This is the main procedure for creating item add-ons that is common for all custom configurations.
Follow the provided instructions to create [item add-ons](/product/retail-pos-processes-item-addons):
1. Search for **Item AddOns**, and choose the related link.\
A list of all existing item add-ons is displayed.
2. Click **New** to create a new add-on.\
The **Item AddOn Card** is displayed.
3. Populate the necessary fields in the **General** and **Lines** sections, described in this [reference article](/product/retail-pos-processes-item-addon-ref) in more detail.
Now you can either attach the item add-on to the main item, or create the POS button for the standalone item add-on menu to be used on the POS.
## Attach item add-ons to the main item
> **Note:** Any custom configuration you may wish to perform should be done between the common creation steps and this procedure. For more details, refer to the [article with custom configuration examples](/product/retail-pos-processes-custom-configurations-item-addons).
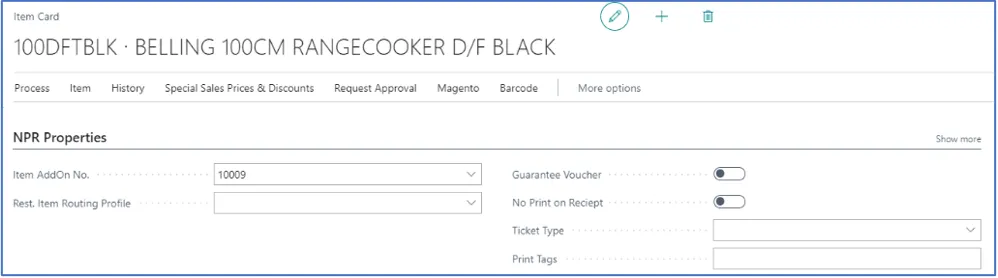
1. Navigate to the **Item Card** of the main item.
2. In the **NPR Properties** section, insert the item add-on code in the **Item AddOn No**.\
Whenever you scan the main item, a second line is added on the POS for the item add-on.
#### See also
* [Item addons](/product/retail-pos-processes-item-addons)
* [Item add-on custom configurations](/product/retail-pos-processes-custom-configurations-item-addons)