> This page is for Product Documentation.
> For clean Markdown of any page, append .md to the page URL.
> For a complete documentation index, see https://docs.navipartner.com/llms.txt.
> For AI client integration (Claude Code, Cursor, etc.), connect to the MCP server at https://docs.navipartner.com/_mcp/server.
# Create buttons in POS menus
> The POS Editor is a collection of options for customizing the POS screen, located in the ribbon up-top. You can also use it to create new buttons in the POS
To create new buttons in the POS menu, make sure the prerequisite is met, and follow the provided steps:
#### Prerequisites
* Enable the [POS Editor](/product/retail-pos-layout-activate-pos-editor).
#### Procedure
1. Open the POS.\
The [POS Layout Setup Wizard](/product/retail-pos-layout-layout-wizard) is displayed.
2. Select the layout category from the available options, or close the Wizard to create all buttons and options manually.
3. (Optional) If there's no space left, click **Grids** in the POS Editor, and edit the number of rows or columns for the selected screen area to make room for new buttons.
4. Click on an empty cell in the POS screen area you wish to add the button to, followed by **Edit** in the dropdown list that is displayed.\
The **Edit Button** window is displayed. It contains various customizable elements for buttons.
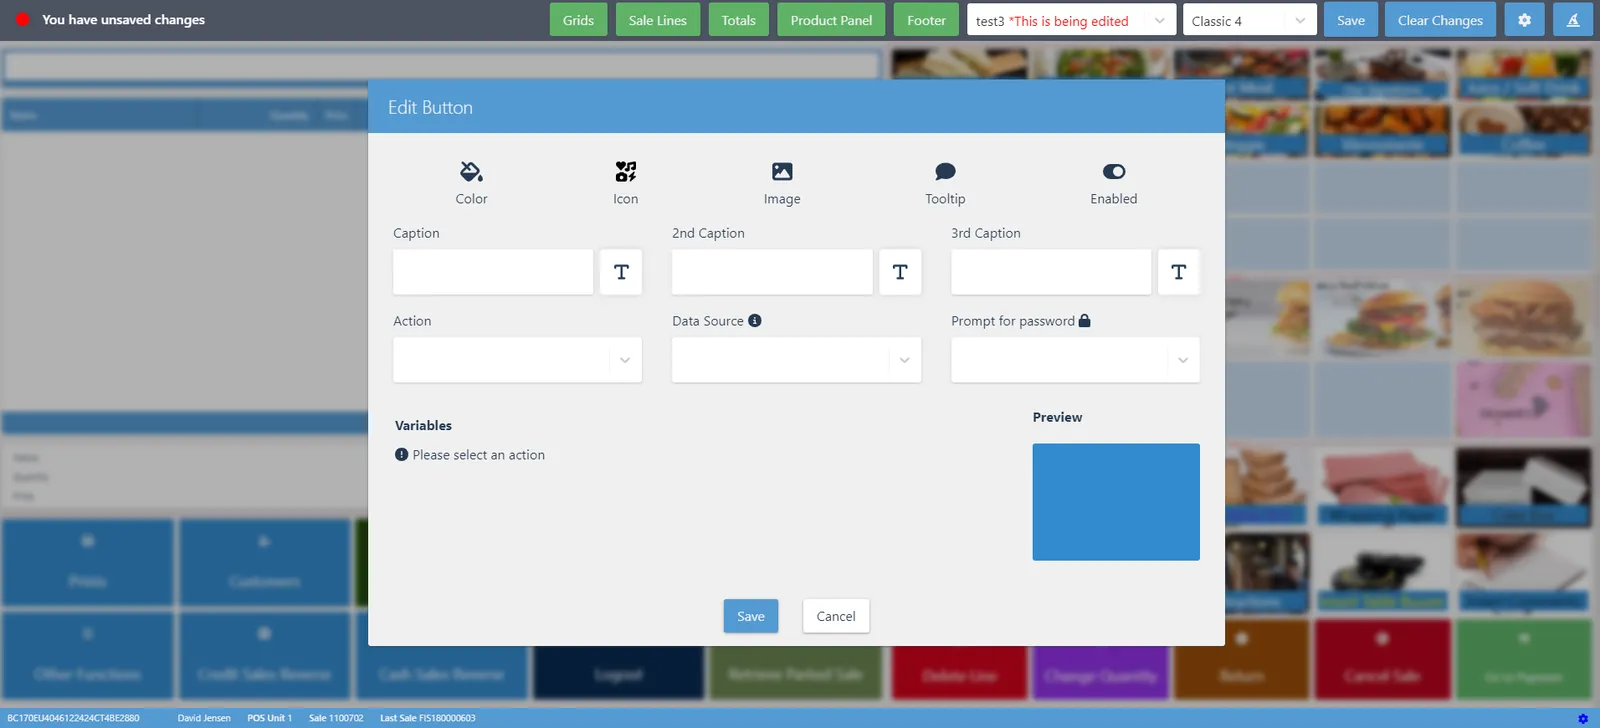
5. Provide the **Caption**, specify its size (you can choose between S, M, L, XL and XXL) and make sure you've attached the desired POS **Action** to it.\
If the POS action you need doesn't exist yet, you can [create it](/product/retail-pos-processes-pos-actions-ref).
6. (Optional) You can also provide an image for the button background, change its color, and even add a password that will be required before the button's action is triggered.
7. Once you're satisfied with your changes, click **Save**.\
The button is now displayed in the selected POS screen area.
### Additional setup - pop-up menus
You can also edit the look and feel of pop-up menus that are displayed once you press certain buttons on the login screen (e.g. **Function**). To do so, open the edit mode, and press the button you wish to modify the pop-up menu for.
#### See also
* [POS editor](/product/retail-pos-layout-pos-editor)
* [Use the POS Layout Setup Wizard](/product/retail-pos-layout-layout-wizard)
* [Create POS menu filters](/product/retail-pos-layout-menu-filters)