Set up Global Dimensions
You can use Global Dimensions to set the analysis codes representing the shops. To define the Global Dimension, you first need to create it:
Prerequisite
- You need to use the NP Retail Manager Role Center to be able to configure all segments of this setup.
Procedure in Business Central
- Click the
 button, enter Dimension, and open the related link.
 - Click New, and populate the Name and Code fields.
- Click Dimension in the ribbon, followed by Dimension Values in the dropdown that is displayed.
The Dimension Values administrative section is displayed. - Click New, and provide the necessary values along with the adequate Dimension Values Type.
Attach Global Dimensions to registers
The next requirement is to attach the dimension to the POS unit. A dimension will need to be attached to each POS unit by editing the POS Unit Card, and selecting the dimension shortcut to assign the dimension and dimension value.
- Click the button, enter POS Unit List, and open the related link.
- Select the POS unit you wish to edit from the list.
- From the ribbon, click Navigate, followed by Dimensions.
- Assign the dimension to the POS unit by providing the adequate Dimension Code and Dimension Value Code.
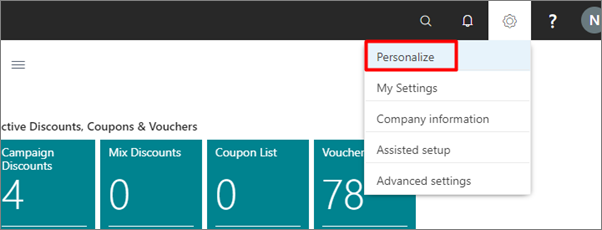
Enable chart visibility
If the chart isn’t visible by default, click ![]() in the top right corner, and then use the Personalize function in the NP Retail Manager Role Center.
in the top right corner, and then use the Personalize function in the NP Retail Manager Role Center.
Define chart type
After personalization, the view will be visible, and you will need to define the dimension by which you want to view the overview.
To do this, navigate to the Insights section of the Role Center, and pick the created dimension in the Chart Type dropdown list.
