Set up Replication Module
As soon as you set up the Replication Module, the provided data will be synchronized, or replicated, automatically between the source company and the target company. To complete the setup, follow the provided steps:
Setup in the Source (Master) companies
- Open the Replication Setup (Source Company) page.
- Click Enable Replication Counter.
This toggle is disabled by default to reduce overhead expenses for companies which aren’t used as a source for the data replication process.
Setup in the Target (Store) companies
- Click the
 button, enter Replication API Setup List, and choose the related link.
- Open the first CUST_NPAPI V1 setup.
- Enter the necessary information in order to enable the setup (the setup is disabled by default).
- Click the ellipsis button next to the Source Company Name field, and select the company from which you want to import data.
The Source Company Id is automatically populated. This field is used by the system when it makes API requests to retrieve data from the selected company.
- Enter the Source Company Tenant if you work in a multitenant environment.
- Select the authorization type and the necessary credentials, then enable the authorization if needed.
- (Optional) Enter an email address in the Error Notification Email Address field.
This will make the system send a predefined email to that address if any errors occur during the data replication process. - Click Test Connection to see if the connection can be established.
- Click Enable if the connection was successful.
After confirmation, the replication setup is enabled and all data in the Source Company is imported into the target company.
Next steps
After you’re done configuring the General replication setup options, you can also configure the Endpoints and Special Field Mappings.
Configure Endpoints
The import is done based on the Endpoints section of the Replication API Setup Card. If necessary, you can configure it.
It is possible to:
- disable specific endpoints (which will terminate data import for those tables).
- change the order in which tables are imported.
- update the Replication Counter field manually.
- update the Replication Counter field automatically via the Get Last Replication Counter action. When you use this, the system makes a web request to retrieve the Last Replication Counter from the source database table. This should be used if the starting point of the replication needs to be changed.
- add a Fixed Filter which will be added to the URL when sending the request. You can use this option if only some of the records need to be replicated and not the whole table. Example: number gt ‘10003’ and number lt ‘10008’. See more.
- add new endpoint configuration.
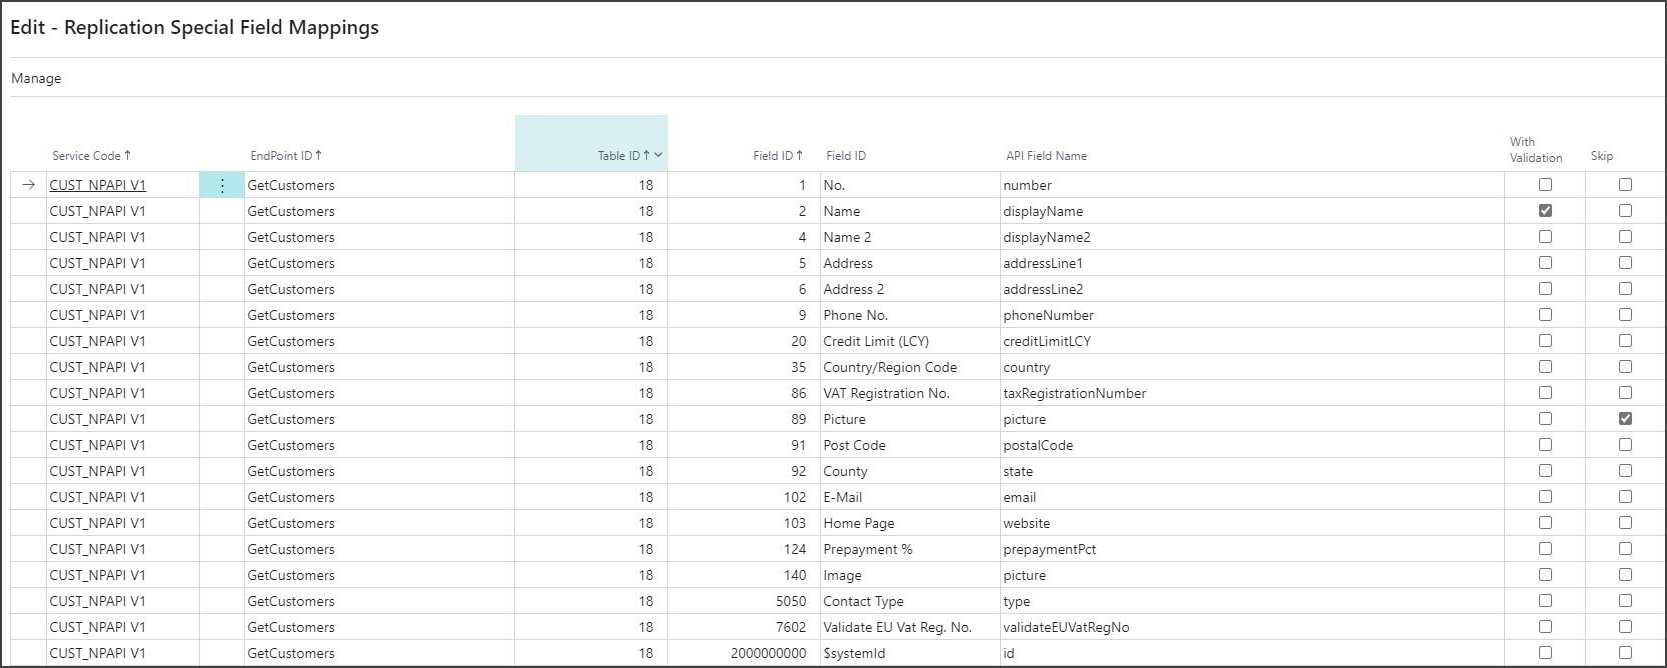
Configure Special Field Mappings
In general, the fields for each table (endpoint) are mapped automatically. In the API page used as a webservice, most fields are named after the table fields in the CamelCase.
Example:
Customer Posting Group –> customerPostingGroup
However, there are special cases when the field names are different. You can use the Special Fields Mappings page to map these. This page is accessed by clicking the Manage button, followed by the Special Field Mappings button in the Endpoints panel.
Example:
Check Missing Fields
You can check if there are table fields that are not handled by the Data Replication module by running the Check Missing Fields report.
This report employs web requests to compare the metadata of the Business Central APIs with the fields from the actual tables. Then, it maps out the fields that aren’t handled via the API, and are thus skipped in the data replication process.