Create a new price label/matrix template
Price labels can be printed in various shapes, sizes and materials to suit the targeted product best. It is for this reason that you may want to create custom price label templates for your business.
This article can also be used as a reference whenever you need to create matrix print templates. Although some options are label-specific, most of the demonstrated configurations can be applied when creating templates for printing coupons and tickets.
Create a basic price label print template
- Click the
 button, enter Print Template List, and open the related link.
On fresh installation, an empty template list is displayed. - Click New to open an empty Template Card.
- Provide a unique name for the template in the Code field.
For the purposes of this example, the code is DEMO_PRICE_LABEL. - Select Matrix in the Printer Type field.
The Matrix Settings panel is displayed below.
Matrix and line printing are described in more detail in the Printer properties article. - Make sure that Zebra is selected as the Matrix Device in the Matrix Settings panel.
You’ve now created the most basic price label print template. However, it’s recommended to also define which tables will be data sources for the template.
Add and link data sources
Click Edit Data Items in the Template Card.
The Data Items page provides an overview of all available data items, their relations, and constraints.Add the NPR Retail Journal Line table as the main data source.
When printing price labels, item data is transferred to a common table NPR Retail Journal Line which serves as the initial data source. Any additional data sources need to be referenced as subsets of it. NP Retail Journal Line contains fields like Item No., Description, Variant Code, Base Unit of Measure, Unit Price, and Barcode.
In this example, the label should contain a Description, Variant Description, Unit Price, and Barcode, so the NPR Retail Journal Line contains all of the necessary information except for the Variant Description. The missing data will be extracted from another table called Item Variant.
Add a line below NPR Retail Journal Line, and select the Item Variant data source.
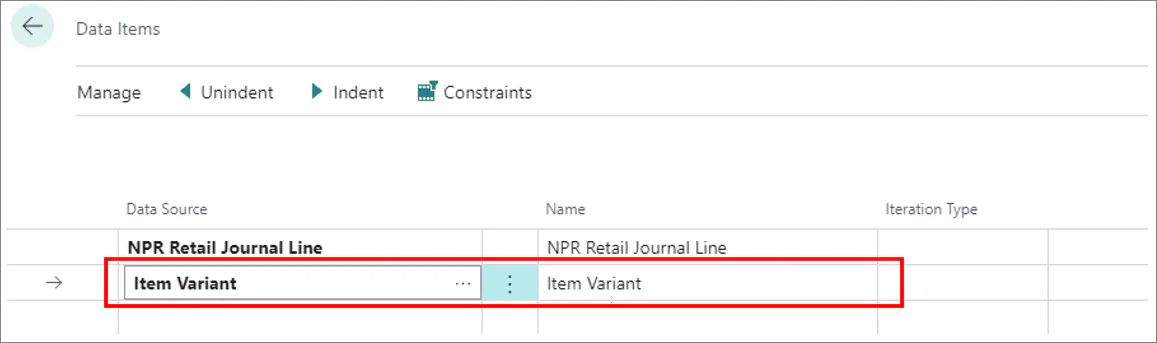
Set the Iteration Type for the Item Variant to First.
As a reference, you can choose between the following iteration types:
| Option Name | Description |
|---|---|
| <blank> | No restrictions will be placed on iterations; all records will be included in the iteration. |
| First | The first available record will be selected. |
| Last | The last available record will be selected. |
| Total | You need to select the fields that should be totaled if you use this option. It works as a summation of the selected fields. |
| Distinct Values | This option is typically used only for the Line Print, when it’s necessary to print all unique/distinct values. |
| Field Value | Used when the number of iterations is determined by a field value (integer). |
- To link two data sources, and make Item Variant a subset of the NPR Retail Journal Line, select the row with the Item Variant, and use the Indent action at the top of the page.
It’s also necessary to set data item links for the item variant in the Data Item Links panel at the bottom of the page.
There are two filter types in the Data Item Links:
- TableLink - compares a field from the parent data source with a field from the current data source
- Fixed Filter - uses a user-defined Filter Value to a field value from the current data source
Establish a link between the Item No. and the Variant Code in the NPR Retail Journal Line, and the Item No. and Code in the Item Variant.

Set up Template Matrix Designer
Navigate back to the Template Card, and click Edit Layout.
The Template Matrix Designer is displayed.
As the Printer Type is set to Matrix, the fields for the X and Y coordinates are displayed.
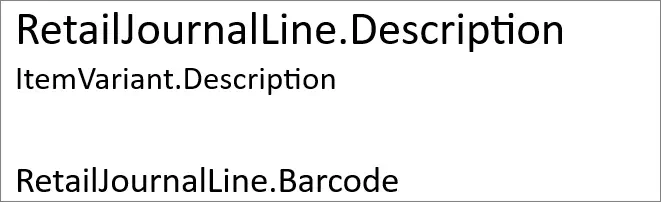
The available Type Options correspond to the selected Matrix device, which is Zebra in this example.For better readability, the order of elements should match the actual output order.This is the visual representation of the layout, taking into account the previously performed setup:
The first line in the layout design needs to be placed in the top left corner. The X and Y coordinates are relative to the previously defined LABEL_HOME, so if the first line is placed at 0,0, the final position will be 10,10 due to this setting.
For Type Option select Font U.
You can use either Fonts or Scale Fonts for the text output. Font A is a small font, whereas Font V is a big font. For the Scale Fonts, it is possible to define other values than the predefined ones, so it could be Scale Font 30,10 if it was to be desired.Open the lookup in the Table Name, and select RetailJournalLine.
The available options will be the data sources defined earlier in the setup.Open the lookup dialog box for the Field Name, and select Description.
This is everything you need to do in order to display the first line of our example. However, other lines can also be set up to match the configuration displayed in the following screenshot: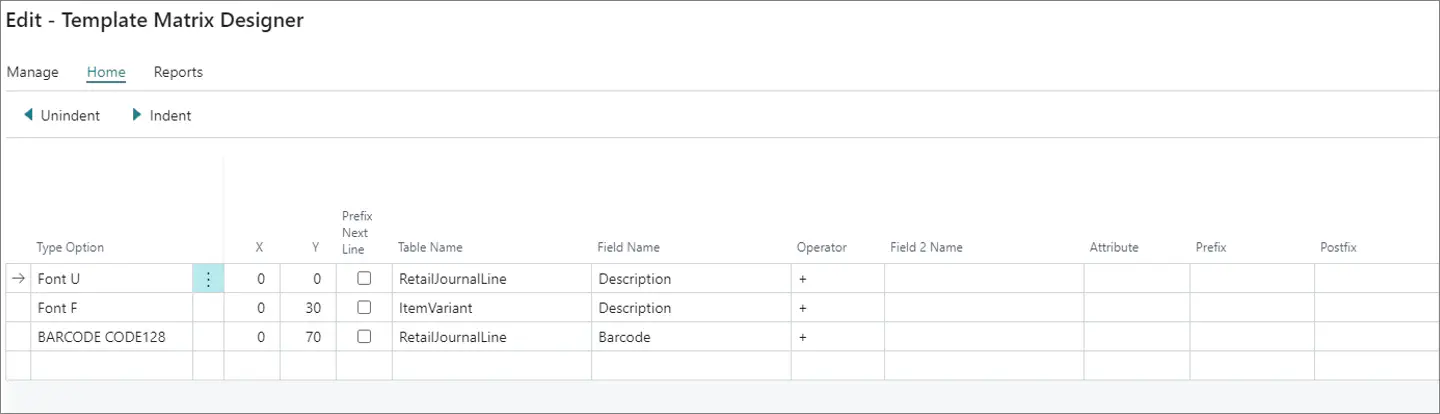
Configure Device Settings
After you’ve finished configuring the layout, click Edit Device Settings.
As with the layout, the selections under the Printer Type and Matrix Device determine the available options.
Typically, LABEL_HOME, PRINT_WIDTH, MEDIA_DARKNESS, and PRINT_RATE are set up to ensure correct calibration and good performance.
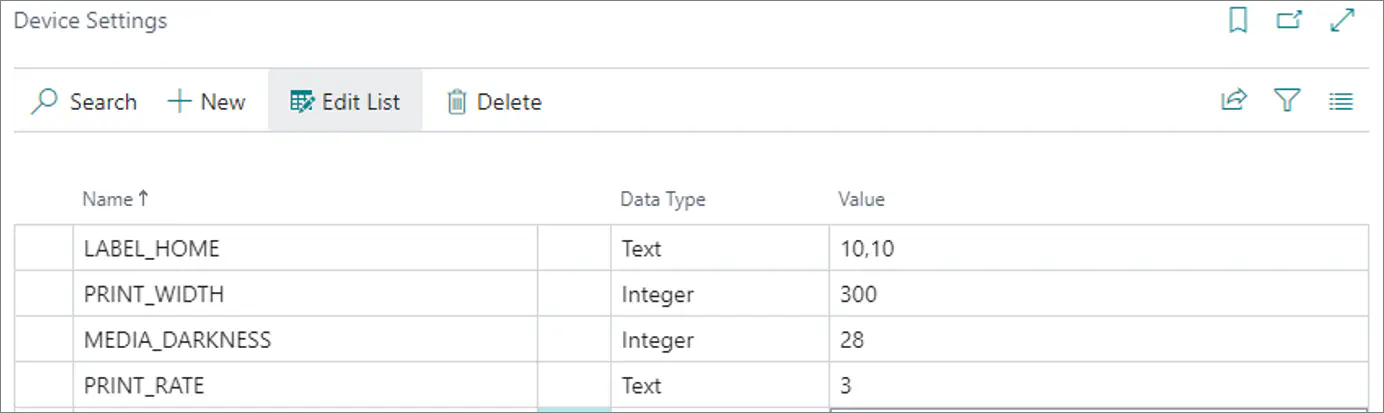
In this example, LABEL_HOME is set to 10,10 to add a small margin from the corner of the label. The other settings may require some tweaking, since they are dependent on the hardware and media specifications. PRINT_WIDTH in this example depends on the DPI, as the value is measured in dots. PRINT_RATE is set to 3, which is the default print rate. MEDIA_DARKNESS in this example is set to 28.