Set up POS Named Action Profile
To ensure you have a fully operational POS unit, certain actions need to be set correctly. This is done with the POS Named Actions profile.
Follow the provided steps to set all actions that need to be set in order to set the POS Named Action Profile.
- Click the
 button, enter POS Actions Profiles and choose the related link.
 - Create New.
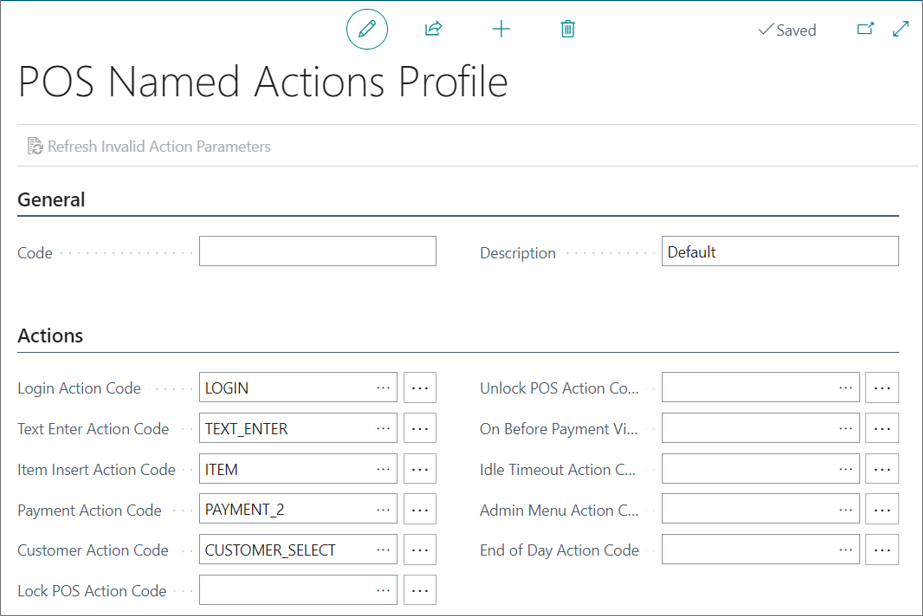
The POS Named Actions Profile window is displayed. - Type in the code in the General section.
- Populate the fields in the Actions section with the correct actions:
| Field Name | Description |
|---|---|
| Login Action Code (required) | Add the action LOGIN. |
| Text Enter Action Code (required) | Add the action TEXT_ENTER. |
| Item Insert Action Code (required) | Add the action ITEM. |
| Payment Action Code (required) | Add the action PAYMENT_2. |
| Customer Action Code (required) | Add the action CUSTOMER_SELECT. |
| Lock POS Action Code | Add the action LOCK_POS. |
| Unlock POS Action Code | Add the action UNLOCK_POS |
| On Before Payment View Action Code | Populate this field with an action that should work before finishing the payment in the POS. |
| Idle Timeout Action Code | Add the action SS_IDLE_TIMEOUT. |
| Admin Menu Action Code | Add the action SS_ADMIN_MENU. |
Next steps
Add the POS Named Action Profile to the POS Unit
After setting up the POS Named Actions Profile, you need to add it to the POS Unit.
Click the
button, enter POS Unit list and choose the related link.Open the POS Unit Card.
Provide the prepared POS profile in the POS Named Action Profile field.