Return items with the second POS screen
The second POS screen can be used by customers to provide any sort of required input during a transaction in a store. For example, if a customer wishes to return an item, they may need to provide their signature, and phone number. To perform the return process on the POS, follow the provided steps:
Prerequisite - Enable the second screen for the POS unit
- Click the
 button, enter POS Unit List and open the related link.
 - Open the POS Unit Card of the POS unit you want to edit.
- Open the POS HTML Display Profile dropdown list, and select the second screen from the list.
Procedure
- Click POS in the Role Center’s ribbon, followed by Open POS.
The POS login screen is displayed. - Enter the Salesperson Code in the provided field to log in.
- Use Item Lookup to locate the item that the customer would like to return. When the item is selected, the customer will be able to see the totals on the second (customer-facing) screen.
- As soon as the customer confirms that the information on the screen is correct, click Return Item.
- Select the return method (e.g. Scan Item).
A pop-up window for providing the item quantity is displayed. - State the quantity of the returned item, and click OK. A pop-up window for confirming the unit price is displayed.
- Confirm the unit price, and click OK.
The Return reasons window is displayed. - Select the return reason from the list, and click OK.
- Select the means by which the funds will be returned to the customer.
The pop-up window for providing the return amount is displayed. - Confirm the return amount, and click OK.
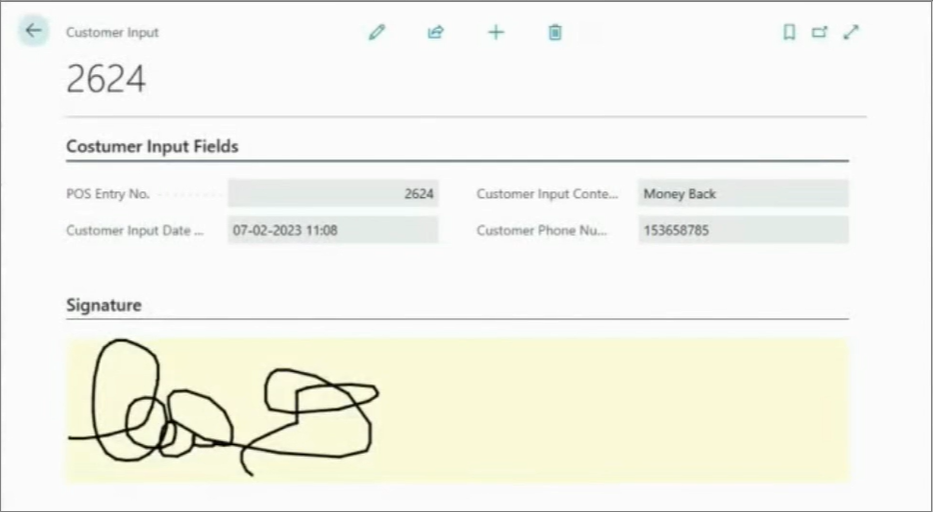
On the second screen, an input box in which the customer can provide their phone number and signature is displayed. This information is then displayed on the main screen. - As soon as you inspect the provided information you can approve it to finalize transaction (or reject it, if some of the information isn’t valid).
If you wish to access the customer information, you can locate it in the POS Entry List administrative section in Business Central.