Set up digital receipts
Digital receipts are a virtual replacement for printed receipts, which reduce the length of the payment path, speed up the process of issuing receipts, and provide a more convenient assurance for warranty or return purposes.
To set up digital receipts, make sure the prerequisites are met, and follow the provided steps:
Prerequisites in Fiskaly Dashboard
- Click Settings, followed by API Keys in the Fiskaly Dashboard sidebar.
- Click Create API Key.
Procedure in Business Central
- Click the
 button, enter Digital Receipt Setup, and choose the related link.
The administrative section for setting up digital receipts is displayed. - Activate the feature via the Enable toggle switch.
The feature can be used globally as a result. - Provide the API Key and API Secret in the indicated fields.
- API key is a unique identifier used for establishing connection with the Fiskaly API.
- API secret denotes the confidential authentication code paired with your API key.
- Click Test API Credentials in the ribbon.
This action is used for validating the provided API key and secret, and ensuring the effectiveness of your Fiskaly API credentials. You will not be able to turn on the digital receipt functionality unless the credentials are successfully tested.
The outcome is reflected in the state of the Credentials Test Success toggle switch, and the date/time of the last test is recorded in the Last Credentials Test Time field. - If the credentials are tested and approved, click POS Receipt Profiles in the ribbon.
Alternatively, you can find the POS Receipt Profiles with the Business Central’s Tell Me feature. - Click New, and populate the available fields and options.
- Open the POS Unit List administrative section, and find the POS unit you wish to set up.
- Open its POS Unit Card, and set the POS Receipt Profile to the one you’ve created in the previous steps.
This POS unit now supports the digital receipt functionality.
Next steps
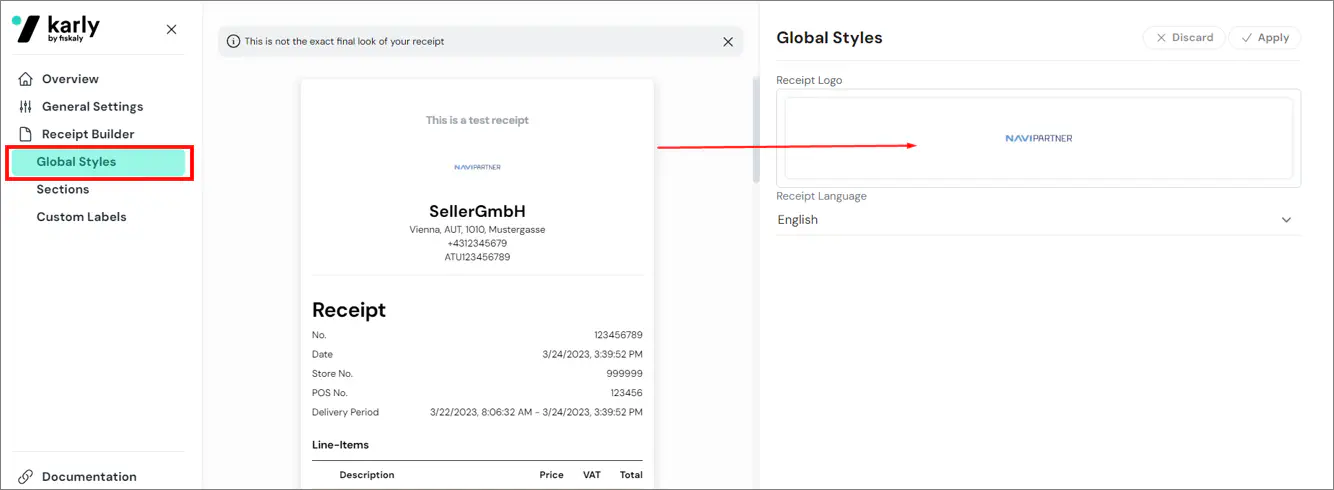
(Optional) Add logo to the digital receipt header
Fiskaly provides an option to add a logo of your choice to the digital receipt header. You can do this from the Fiskaly Dashboard.
Click Fiskaly Receipt in the sidebar of the Fiskaly Dashboard.
A new page is displayed.Choose Merchant Dashboard from the available options.
From here, you can configure various settings for your receipts.Access the Global Styles section, and click Receipt Logo.
Select the picture/logo for your digital receipt, and click Apply.
(Optional) Configure the PRINT_RECEIPT POS action
The POS action PRINT_RECEIPT has two parameters that you can configure, depending on how you wish to use the feature.
- Print Physical Receipts - When set to true, the associated action will be used for reprinting physical receipts. This parameter is set to true by default.
- Issue Digital Receipts - When set to true, the associated action will be used for displaying the QR code of the selected POS sale again if it’s been closed on accident. This parameter is set to false by default.
If you need help with configuring this POS action and its parameter, refer to the article on Creating buttons in POS menus.
Issue digital receipts on the POS
Perform a POS sale.
After a regular POS sale has been completed, and the payment accepted, a pop-up window that contains a QR code is displayed.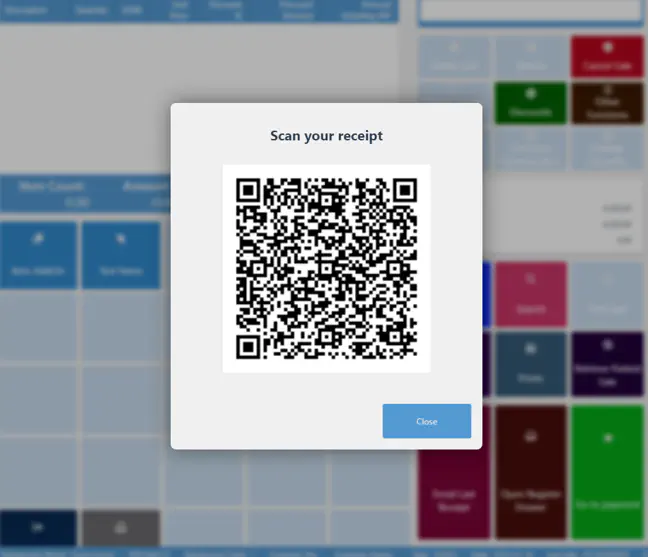 For the QR code to be successfully displayed, you need to make sure the Issue Digital Receipts parameter of the PRINT_RECEIPT action is set to true.
Scan the QR code to open a PDF link with a visualized digital receipt.
You can also find the QR code if you open the POS Entry Card, and locate the factbox section, where the POS Sales Digital Receipts line is located. If you click the number on the POS Sales Digital Receipts line, the corresponding digital receipts linked to that POS entry are displayed.