Configure the POS balancing feature
This guide outlines how to set up the POS balancing feature, which is primarily configured in the POS End of Day Profile. Multiple profiles can be created and assigned to individual POS units.
To configure the POS balancing feature, follow the provided steps:
- Click the
 button, enter POS End of Day Profile, and choose the related link.
 - Click New to open a blank NPR POS End of Day Profile Card.
- Populate the fields while referring to the EOD reference table.
- Search for POS Actions Profiles, and create a new POS Named Action Profile (or modify an existing one).
- In the End of Day Action Code field, enter POS Action BALANCE V4 to enable the balancing function.
- (Optional) To enable denomination-based counting:
- Navigate to the relevant POS Payment Method Card.
- Select Denominations and configure denominations for each currency type.
- Open the POS Payment Bin for the relevant POS unit and select Insert Initial Float in the ribbon.
- Open Report Selection - Retail and configure the following settings:
- For Report Type, select Balancing Receipt.
- Set the print template to EPSON_END_OF_DAY_X.
- For Large Balancing Receipt, set Report ID to 6014459 – Balancing Report - A4 - POS.

Next steps
Set up the counting and transfer process
When you click Cash Count on the POS, you are presented with the counting screen. In the top-right corner, you can see which currencies have been received in the POS, that require counting and balancing of the POS unit.
If the button is marked in read, that means that the currency hasn’t yet been counted. After the count is completed, there will be a green tick next to it.
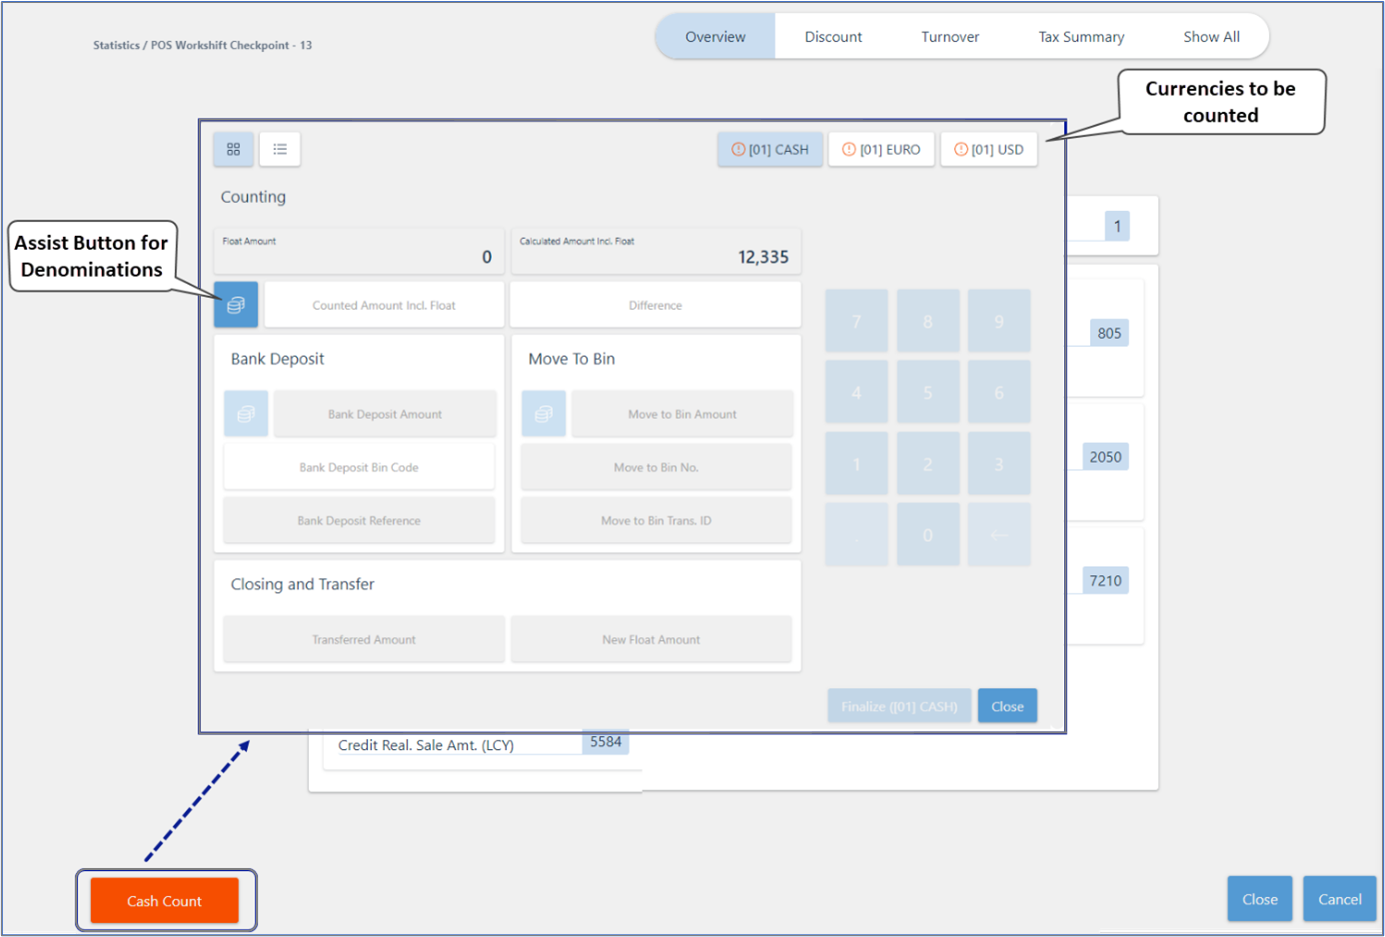
For detailed information on counting screen fields and options, refer to the reference guide.
Generate end-of-day report (POS balance)
Once the necessary configurations are complete, you can move on to balancing the POS at the end of the work shift.