Transfer and post stock-take worksheet
Once the setup has been completed, you can complete the stock-take transfer. The main focus and goal of the stock-take functionality is for the Counted (physical, on-hand inventory) quantity and the Calculated (system) quantity to be transferred to the Physical Inventory Journal to check whether there are some discrepancies between the two. The counted quantity is established with the stock-take worksheet, while the calculated quantity originates from the Item Ledger Entries.
Prerequisites
Procedure
To initiate this process, set the stock-take worksheet’s status to Ready to Transfer in the relevant Stock-Take Worksheet card.
Mark all lines, and click Line in the ribbon of the Stock-Take Worksheet Line panel, followed by Set Transfer Option to Ready.
It's recommended to match the Posting Date with the Inventory Calculation Date.Click Calc. Inventory and Transfer in the Actions dropdown.
When completed, a confirmation message is displayed.
If the Transfer Action in the relevant Stock-Take Configuration Card is set to Transfer, you also need to manually post the inventory journal.
In the provided example, certain items weren’t counted, as per the applied configuration.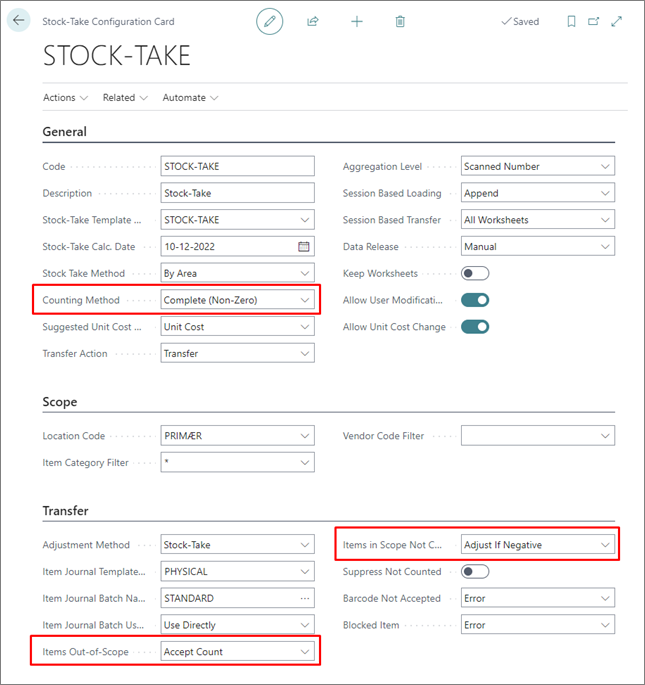
Accept the current stock level for items that weren’t counted.
Adjust the negative stock values to zero.
In the provided example, Suppress Not Counted is false, so the description is modified.Adjust the items that have been counted.
Navigate to the Physical Inventory Journals administrative section, and select the line you wish to post.
Click Actions, followed by Post or Post and Print.
The standard Test Report should be used to document the deviations and the corresponding values.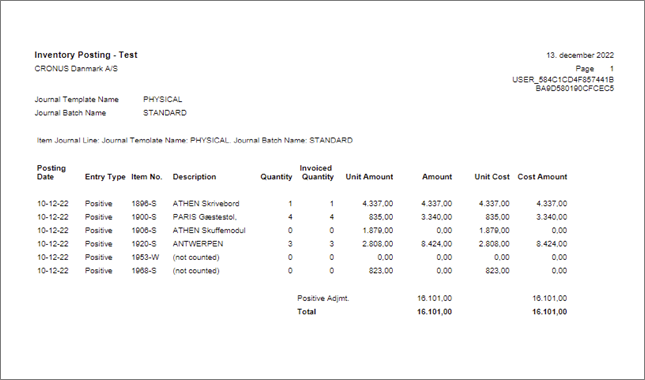
If you navigate back to the Stock-Take Worksheet, you’ll find that the worksheet status has been updated to Complete, and that all worksheet lines are set to Transferred.