MPOS action setup for Scandit
The following MPOS actions are used for configuring the Scandit integration with NP Retail:
M_SCANDITITEMINFO - it gives users the ability to use the camera on their mobile devices to scan an item barcode and receive predefined information. The layout of the information can be set up in Business Central.
M_SCANDITSCAN – it gives user the ability to use the camera on their mobile devices to scan an item barcode and then use their mobile devices to find the same barcode on a shelf or some other place.
Find item barcode with camera
Prerequisite
- Make sure the M_SCANDITSCAN POS action is configured in Business Central.
Procedure
Open the MPOS.
Add an item to the cart.
Press Scandit Find Item from the main dropdown menu.
A camera is used for finding the barcode in the user’s surroundings. The matching barcode is colored in green, while the barcodes that don’t match are colored in grey/white.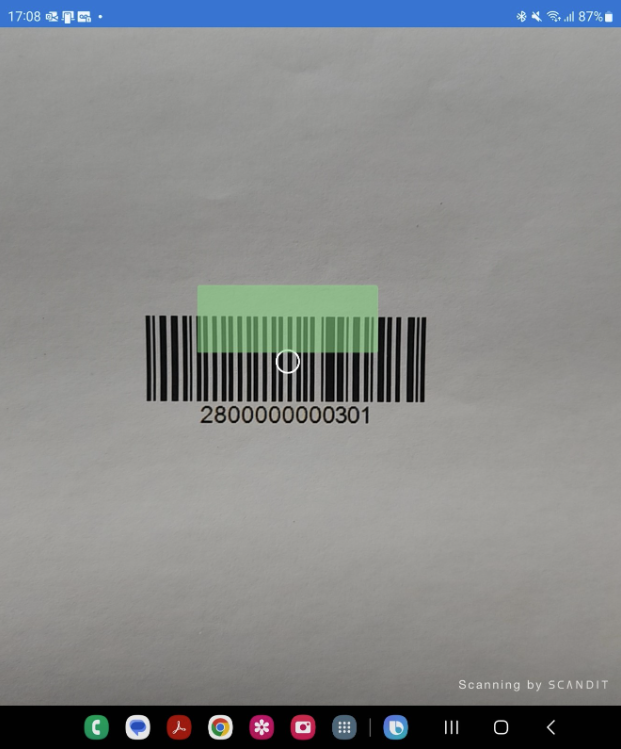
Scan a barcode to view the item details
Prerequisites
- Make sure the M_SCANDITITEMINFO POS action is properly set up.
- Navigate to the MPOS Data Views administrative section in Business Central, and choose which information will be displayed on the mobile device. Make sure the following parameters are properly configured:
- The Data View Type field should be set to NaviConnect.
- The Data View Category field should be set to Inventory from Barcode.
- The REsponse Size field should be set to Small.
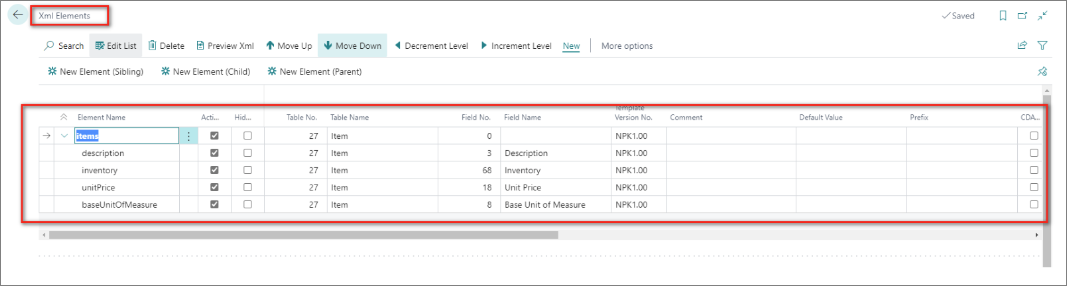
Create an XML template, for example MPOS-INV-ITEM-SMALL, and Edit Field Mapping in the manner presented in the following screenshot:
Procedure
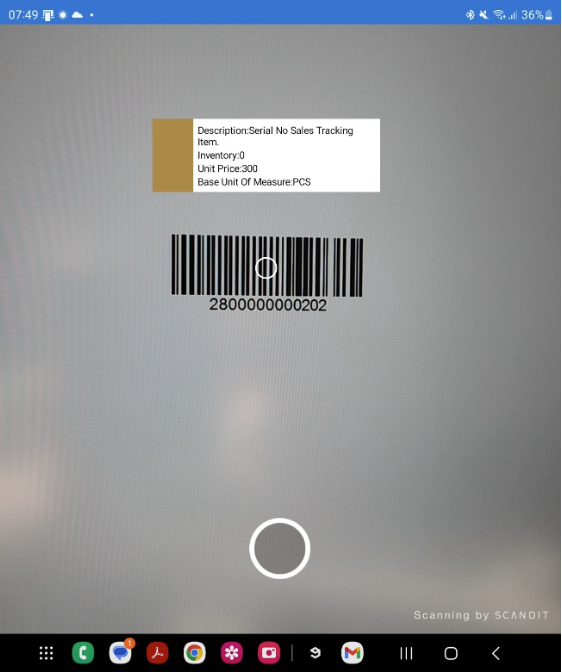
Open the MPOS.
Scan a barcode to view the details of an item.
Press Scandit Item Info in the main dropdown menu.
The item details are displayed.