Create new buttons in the MPOS menu
To create new buttons in the NP Retail POS mobile app, make sure the prerequisite is met, and follow the provided steps:
Prerequisite
- Activate the MPOS editor.
Procedure
Open the POS with the MPOS layout in which you want to create buttons from your desktop/browser version of Business Central.
Although you can't edit buttons and actions on your mobile device directly, all changes performed on the desktop are applied in the NP Retail POS mobile app upon reload.Open the MPOS Editor by clicking
. Click on an empty cell in the MPOS screen area you wish to add the button to, followed by Edit in the dropdown list that is displayed. You can also edit an existing button, as presented in the screenshot below.
The Edit Button window is displayed. It contains various customizable elements for buttons.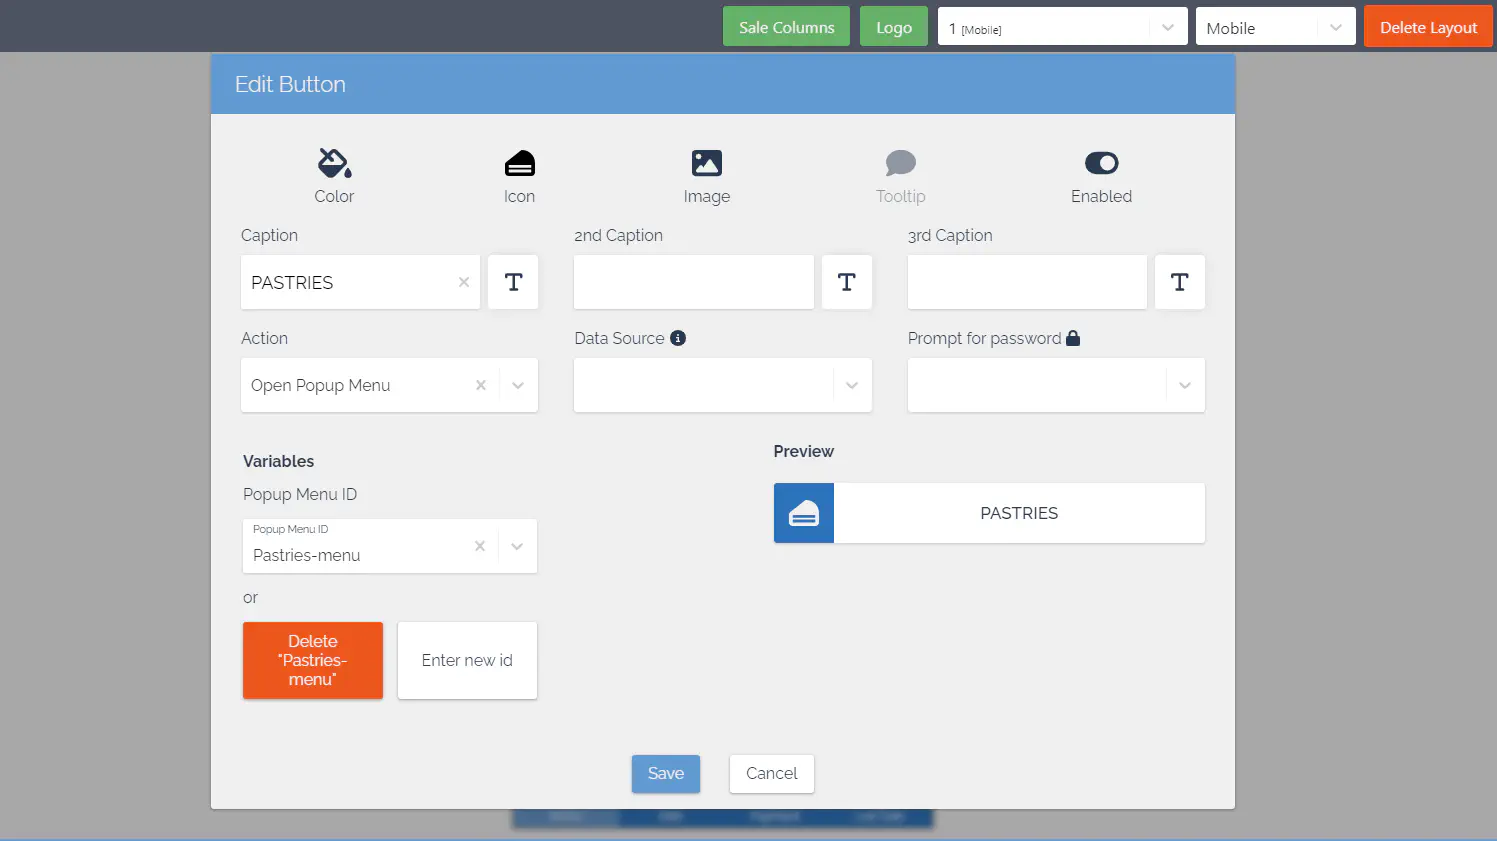
Provide the Caption, and make sure you’ve attached the desired POS Action to it.
If the POS action you need doesn’t exist yet, you can create it.(Optional) You can also provide an image for the button background, change its color, and even add a password that will be required before the button’s action is triggered.
Once you’re satisfied with your changes, click Save.
The button is now displayed in the selected MPOS screen area.Open the NP Retail POS mobile app to view the changes on your mobile device.
You may need to refresh the app for the changes to take effect.