Activate and use the MPOS editor
The MPOS editor gives users the option to set POS actions and buttons directly from within the MPOS UI, without having to work in Business Central back office in parallel. However, to make sure it’s operational, you first need to activate it by following the provided steps:
Click the
 button, enter POS Layouts and open the related link.
Create a New layout.
Provide a unique Code which will help differentiate the layout from the others in the list.
(Optional) Add the Template Name.
You can view all available templates and choose the one that suits your business needs best once you open the POS.Open the POS Unit List, and choose the POS unit you wish to apply the MPOS layout to (or create a new one).
The POS Unit Card is displayed.In the Profiles tab of the POS Unit Card select the layout you’ve previously created from the POS Layout Code dropdown.
Open the POS.
If you’re opening it for the first time, you can choose the one you’ve edited from the pop-up window that is displayed. Otherwise, you can choose your POS unit in the User Setup.Click the
icon, to open the POS Editor. If the MPOS-friendly layout isn’t applied, click New Layout, and then New Layout again.
Make sure the toggle switch points to the Mobile Layout option, and add the Layout Name.
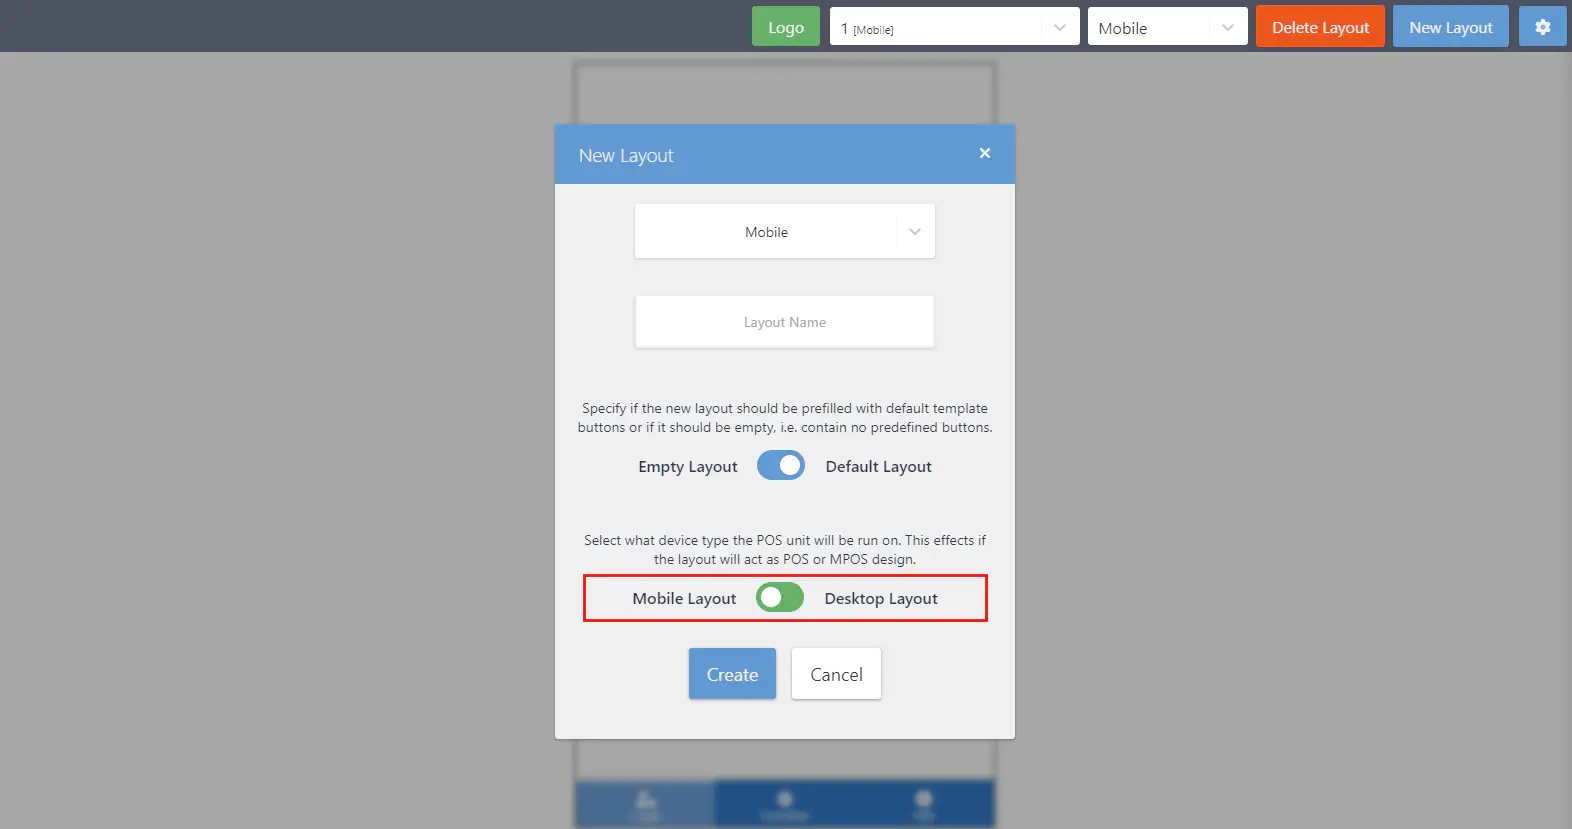
The screen shrinks in size to match the mobile device screen as the result.
Save the layout, and log in.
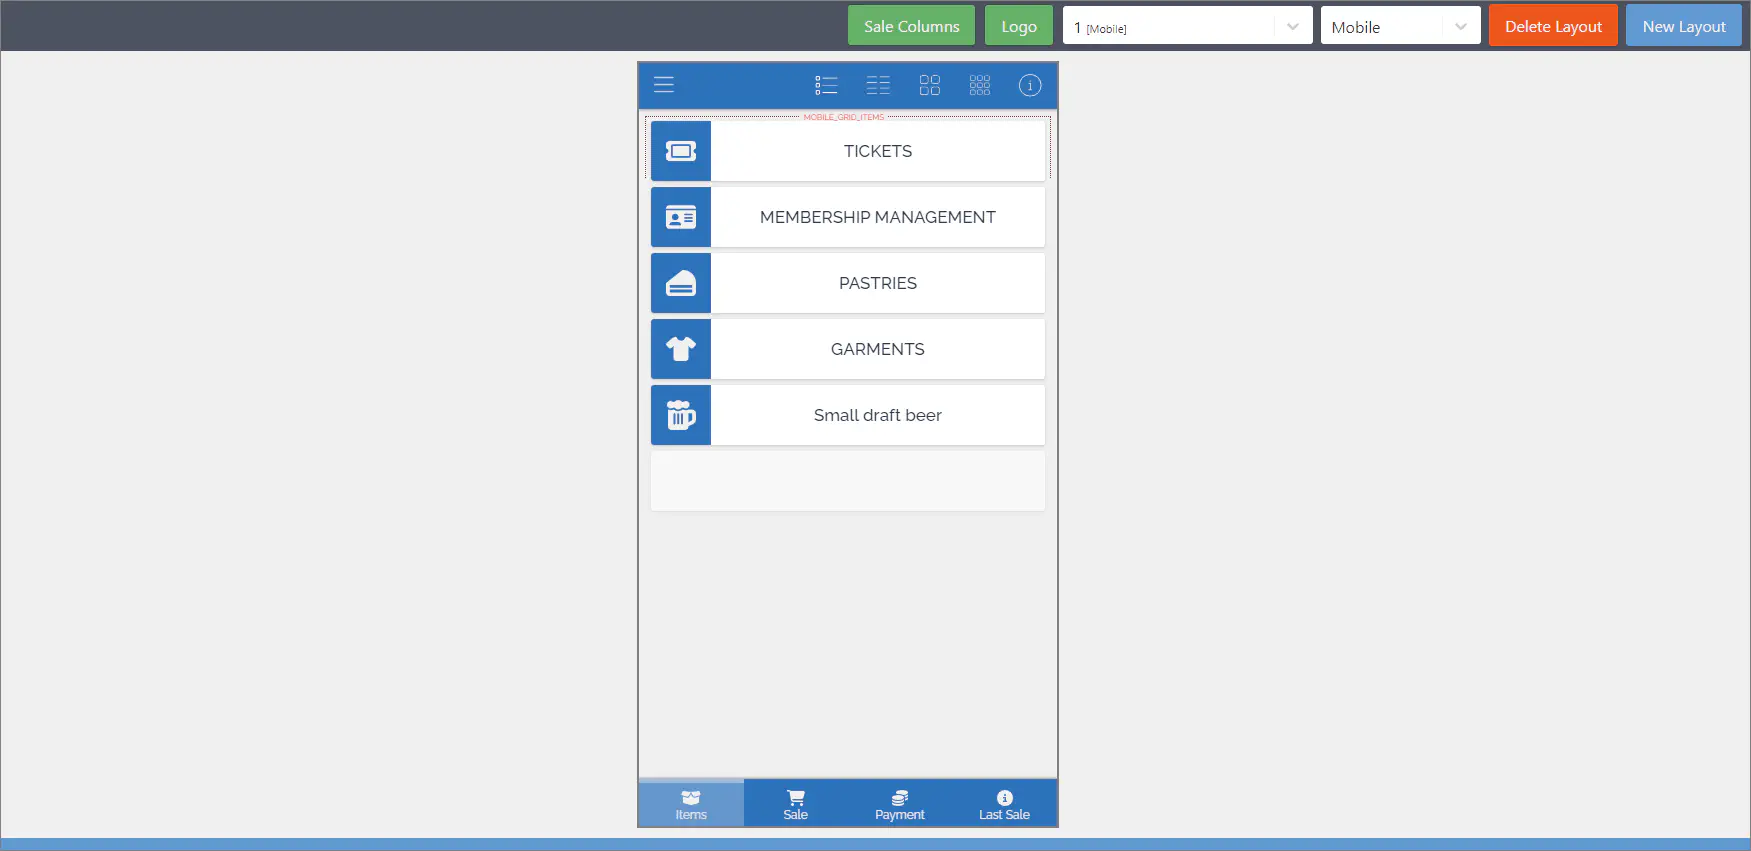
Once you’re logged into the MPOS in the browser, you can use the POS Editor to edit buttons, upload a logo, and choose which options will be available to MPOS users.
Next steps
Assign a mobile device to a POS unit
- To assign a mobile device to a POS unit, navigate to the MPOS QR Code List administrative section.
- Click Set Defaults, and then Create QR Code.
The necessary QR code is now generated. - If you haven’t, download the NP Retail POS application from the app store and install it.
- Open the NP Retail POS app.
- Press D365 BUSINESS CENTRAL - ONPREM and scan the QR code generated in the MPOS QR Code List.
This step is only necessary if the app is opened for the first time. - Navigate to the homepage and press POS. The changes performed on the desktop are applied on the MPOS upon reload. The design on the editor is now the same as the one on the MPOS.
Create/edit buttons in MPOS menus
To create new or edit the existing buttons in the MPOS layout you’ve just created, follow the steps in the procedure for Creating new buttons in the MPOS menu