Get started with NP Retail setup wizard
The wizard helps users set up essential components of NP Retail like POS Stores, POS Units, POS Profiles, POS Payment Methods, and the POS Posting Setup.
To set up the Getting Started Wizard, make sure the prerequisites are met, and follow the provided steps:
Prerequisites
- Complete the basic setup of Business Central (chart of accounts, posting setup, VAT setup, sales & receivables setup, purchase & payables setup, and inventory setup)
- Install the Business Central extension for NP Retail.
Procedure
Log into the NP Retail role center.
Click Get Started to initiate the setup wizard.
The Retail setup checklist is displayed.Click Start next to each instructional video, to get the necessary information for setup of each essential NP Retail entity.
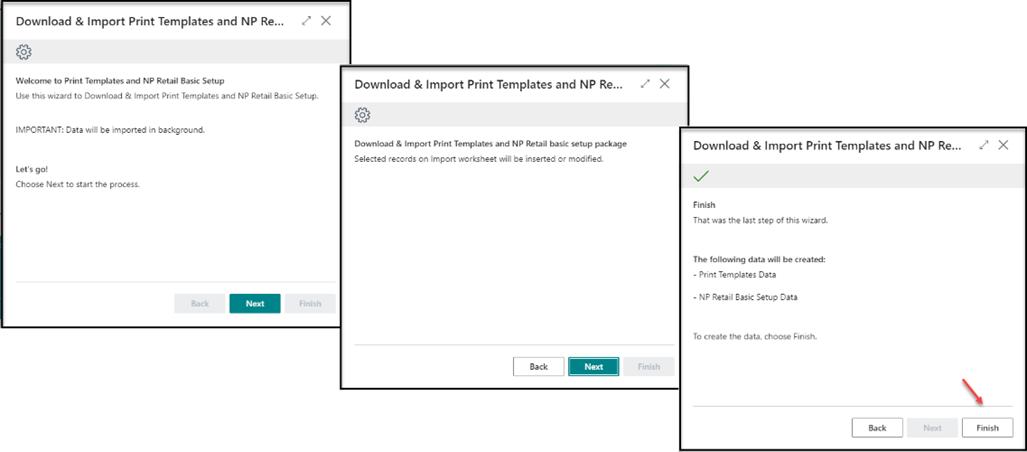
Download, edit, and import the Retail Print Templates
Create POS stores and POS units.
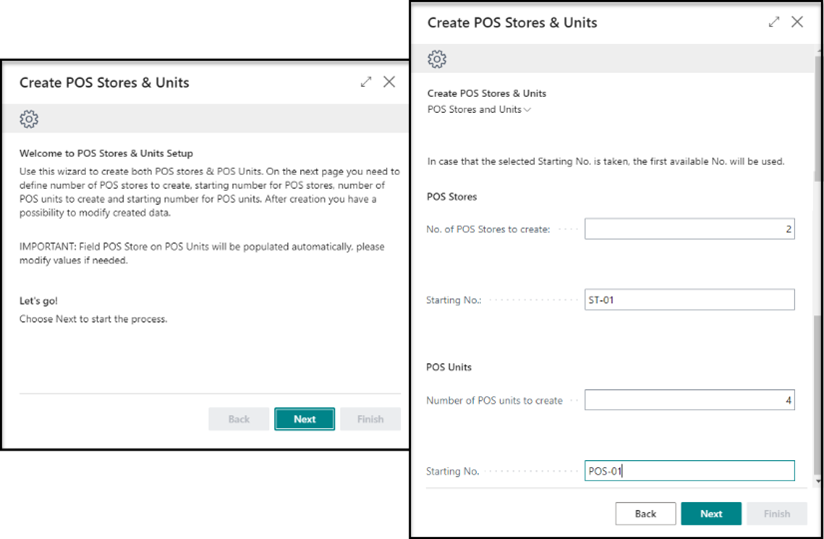
You are presented with a screen for providing master data related to different POS stores. The information is automatically picked based on your Company Information page, but it needs to be modified according to the exact store and POS data.
Modify the POS Posting Profile, i.e. the general profile for the POS store, which contains general posting setup and default accounts used by your POS store.
The required fields are:
- General Business Posting Group
- VAT Business Posting Group
- Differences Account
- POS Sales Rounding Account
If some of the accounts haven't yet been created, you can create them on the fly.Click Finish.
Modify the POS Payment Methods.
A sample payment method is automatically created, but you need to modify it or add other payment methods. You also need to check the validity of Rounding Precision, Rounding Type, and Rounding Accounts.- Rounding Precision - specifies how precise the applied rounding will be. It represents the lowest denomination used for the selected payment method.
- Rounding Type - specifies which rounding type will be applied to the amount.
- Rounding Accounts - specifies which G/L accounts will be used for rounding gains and losses.
Complete the setup by clicking Finish.
You can always create additional payment methods afterwards.Modify the POS Posting Setup.
These configurations specify how the transactions and the end-of-day balancing will be posted in the general ledger and subledgers.Before modifying the POS posting setup, you need to create the different accounts in the Chart of Accounts or Bank Accounts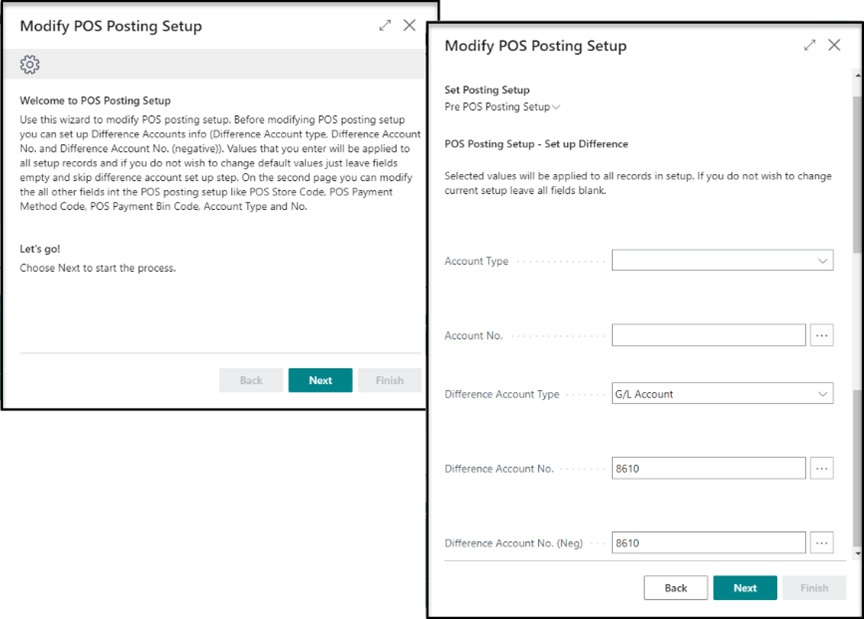
The required fields are:
- Difference Account Type
- Difference Account No.
- Difference Account No. (Neg.)
Complete the setup by clicking Finish.
Create the salespeople that are going to log into the POS.
Additionally, you will be presented with several examples that already exist in the database, which you can modify or delete. At least one salesperson is necessary to start working in the environment.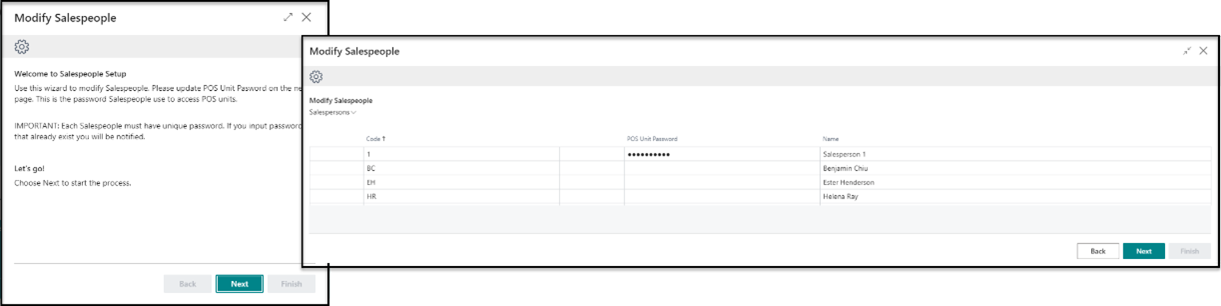
Complete the setup by clicking Finish.
The POS is ready to be used.
Next steps - POS Layout Setup Wizard
Use the POS Layout Setup Wizard to customize the POS screen.