Set up email templates
You can create custom templates which will be sent via email to customers in various scenarios. For example, if a membership is about to expire, the affected customer may be notified via an email, the content of which is defined in the E-mail Templates administrative section in Business Central.
To set up email templates, follow the steps provided in this article:
Click the
 button, enter E-mail templates, and choose the related link.
Click New in the ribbon.
Fill in the following data:
- Code - the code should help easily distinguish this template from the others, and it needs to be unique.
- Description - specifies additional information about the template’s usage; it is optional.
- Table No. - the table ID provided here depends on what kind of email template you’re building.
- Filename - specifies the name of an attached file.
- Subject - specifies the name of the email subject line.
- From E-mal Name - specifies the name of the email’s sender.
- From Email Address - specifies the address of the email’s sender.
If you wish to format the email template though HTML, activate the Use HTML Template toggle switch, and click the three dots next to HTML template to open the text editor where you can provide the code snippet.
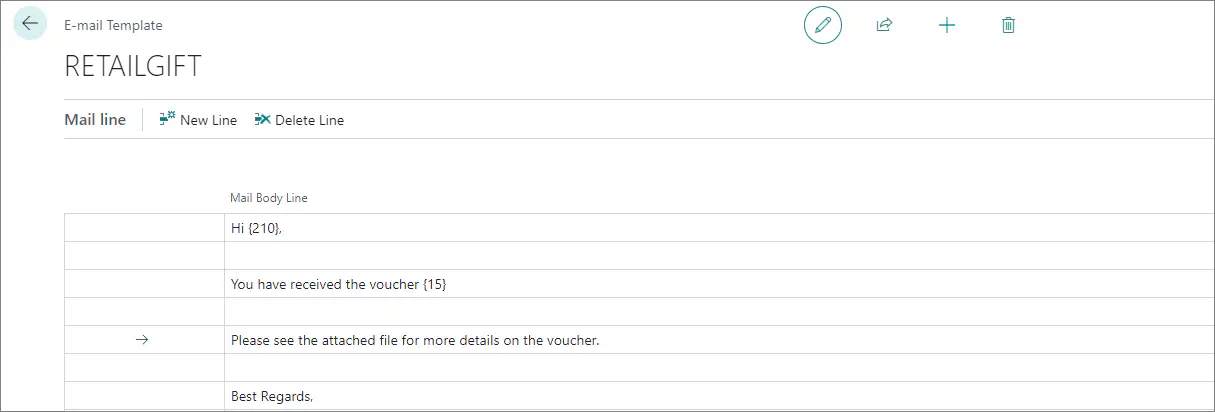
Add the email body to the Mail Line section.
You can reference values from the table provided in Table No. as presented in the following screenshot.