Install Power BI for Attraction
Analyze your business operations and performances using Power BI App for Attraction To install the application, follow the provided steps:
Prerequisites
Prior to initiating the installation process, it is imperative to ensure that you have an active Power BI account associated with the same business email address used for logins in Business Central. This alignment of email addresses will facilitate a seamless integration and ensure a smooth installation experience.
Procedure
Log into your Power BI account.
Go to the Microsoft AppSource and find our product NP Power BI for Attraction. Click Get it now to get the installation pop-up window.

Click Install and wait until the application is installed.
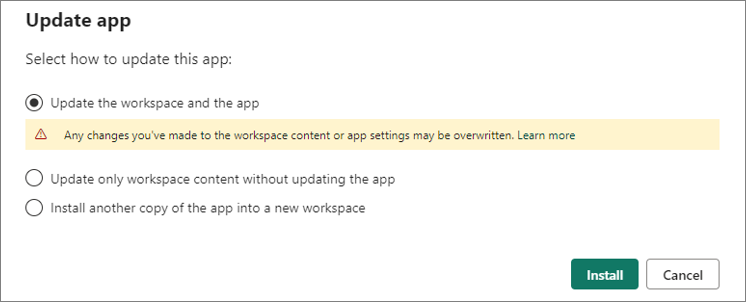
When the application is installed, it will be added to your list in the Apps section.If you’ve already installed the application, you can update it to the new version by selecting the first option in the update app pop-up window, or install a new copy by selecting the third option. After selecting the third option, you need to add a new name of the installation app, and confirm it.
Once the app is installed, click on the application name to initiate its activation.
You can review the contents with the test data or connect to your test database from Business Central.If you determine that the app suits your business and organization needs, contact us to obtain the App link with unlocked parameter fields.
This specialized version facilitates seamless integration with the newest Business Central version.To connect to your data from the Business Central, click Connect your data from the alert ribbon.
It will guide you to a new pop-up window - Connect to NP Power BI for Attraction.In the Connect to NP Power BI for Attraction popup window populate the three fields as indicated in the provided screenshots.
Make sure to write ENVIROMENTNAME-PROD from the URL (https://businesscentral.dynamics.com/3850537a-9e72-423a-9ff9-asdasd345322/EnviromentName-Prod?company=Test%20Company%20Aps&node=0000233e) in capital letters.
Make sure that the Company field contains the name from the URL without the extra characters for blank spaces ("%20").
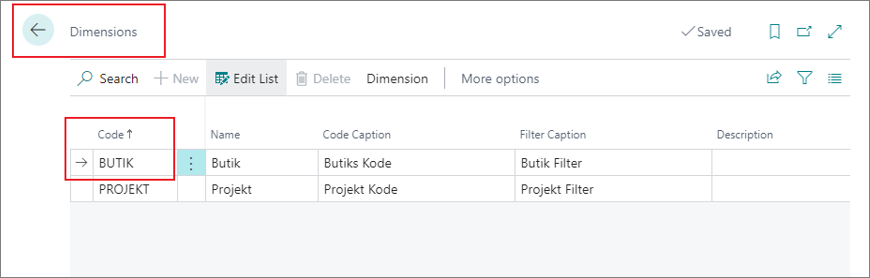
You can also find exact name on the list of Available companies from right upper corner.For Store Code, open the Dimensions table, and find a value that refers to shops (in our case it is BUTIK).
 If your Global Dimension Code 1 does not refer to shops, or starting month of your fiscal year is different from the calendar year, please get in touch with us.
Click Next.
Select OAuth2 as the Authentication method and configure the privacy level settings as Organizational.
Once authenticated, proceed by clicking the Sign in and connect button to initiate the synchronization of your Power BI app with the data sourced from Business Central.
Note that this step may require a considerable amount of time. Upon completion, you will gain access to your personalized data within the report.By default, the automatic refreshing is scheduled once per day, adhering to the predefined settings. However, you have the flexibility to modify this frequency according to your own preferences. Simply navigate to the dataset settings to customize the automatic refreshing interval to suit your needs.