Set up NP Pay reconciliation
Certain configurations need to be completed in Business Central to make the NP Pay Reconciliation available. In addition to the general setup, you also need to configure webhooks, the general ledger or bank accounts for journal types.
To set up NP Pay Reconciliation Automation in the SaaS environment, make sure the prerequisites are met, and follow the provided steps:
Prerequisites
- Retrieve the NP Pay Web Service User credential from NaviPartner.
- Retrieve the NP Pay Report Service User credentials from NaviPartner.
Procedure
- Click the
 button, enter NP Pay Setup, and choose the related link.
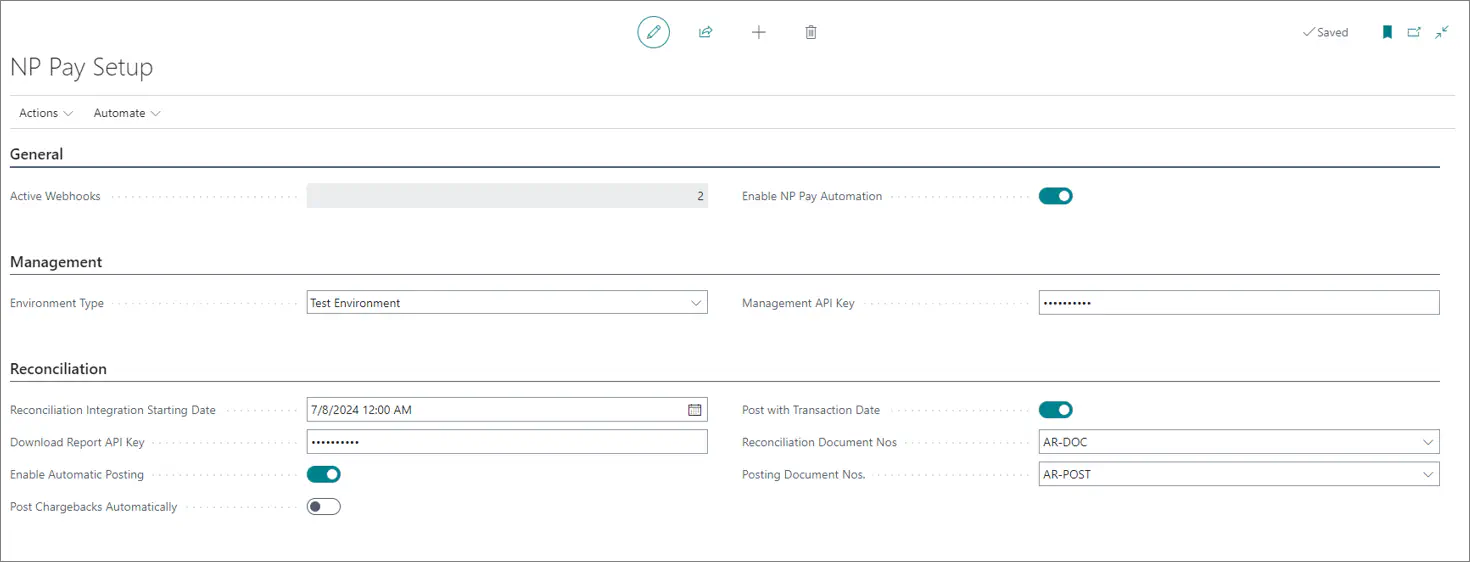
The NP Pay Setup administrative section is displayed. - Activate the Enable NP Pay Automation toggle switch.
It creates a common web service for importing NP Pay webhooks and allows you to activate specific integrations such as Pay by Link without adding the reconciliation functionality. - Activate the Enable Reconciliation toggle switch if you want to handle reconciliation tasks.
It creates a job queue for processing reconciliation webhooks and initializes the reconciliation webhook setup if it’s missing. - Set the Environment Type in the Management section to either Test Environment or Live/Production Environment depending on the type of your NP Pay account.
- Provide the Management API Key received from NaviPartner as the Web Service User Credential.
The key is automatically validated when the API key is provided. You will receive a warning if the key has expired or if it’s been removed. - Move on to the Reconciliation section, and input the Download Report API Key received from NaviPartner as the Report Service User Credential.
- Specify the number series for creating reconciliation documents in the Reconciliation Document Nos field, and specify the number series for posting during the reconciliation process in the Posting Document Nos.
- Specify whether you want the reconciliation lines to be automatically posted after the matching is successfully completed in the background.
If you decide to leave automatic posting disabled, you can use the Reconcile action instead. - Specify whether you want the chargeback-related transactions to be automatically posted or triggered manually.
- Specify whether you want to post the entries with the Posting date being the same as the Date of Transaction.
- Set the Reconciliation Integration Starting Date from which the integration will become effective.
- Click Actions in the ribbon, followed by Configurations in the dropdown list, and then click Upgrade Payment Lines to mark all payments before the specified date as reconciled.
- Enable NP Pay Automation in the General section to create a web service and job queue for processing reconciliation-related webhooks.
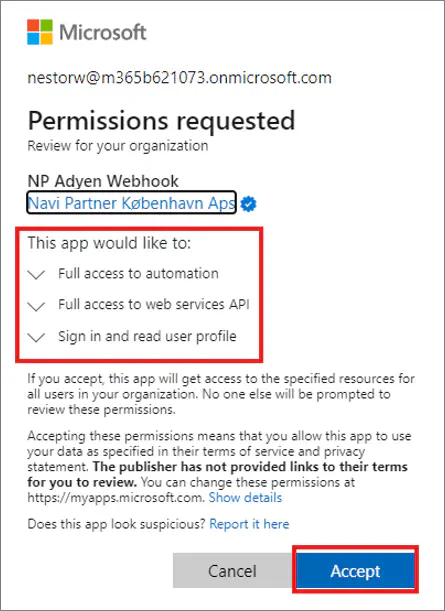
- Give consent for the NP Pay webhook application to access the automation, web service API, and sign by clicking Create Setup (Admin) under Actions/Configurations.
Next steps
Configure webhooks
Navigate to the NP Pay Webhook Setup List page to configure notifications for new reports.
Click Import Webhooks from NP Pay to retrieve and create an NP Pay Webhook Setup Card for each webhook.
Create a New webhook, and populate the following fields:
- Webhook Type - select the type based on the required events, e.g. REPORT_AVAILABLE
- Describe Webhook - provide a description to ensure easier identification
- Web Service URL - use the Suggest Web Service URL option to fill in the link automatically
- Active - specify whether the webhook is enabled or not
- Merchant Account - select the merchant account that will trigger the webhook
Send webhook configuration to NP Pay by clicking Set up a Webhook.
A confirmation message is displayed.
Set up merchant account
Navigate to the NP Pay Merchant Accounts page.
Select a merchant, and click Open Setup in the ribbon.
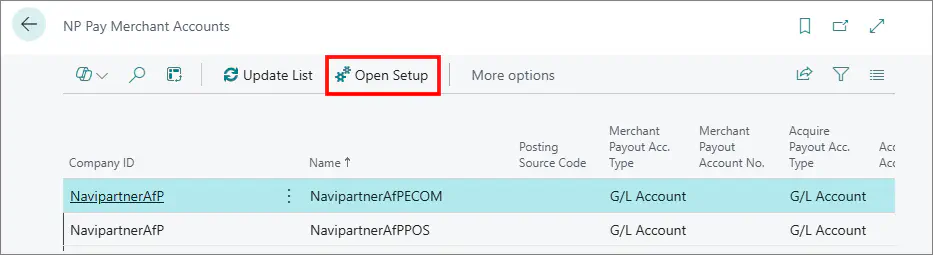
If no associated Merchant Account Setup exists, the system will prompt you to create a new one.
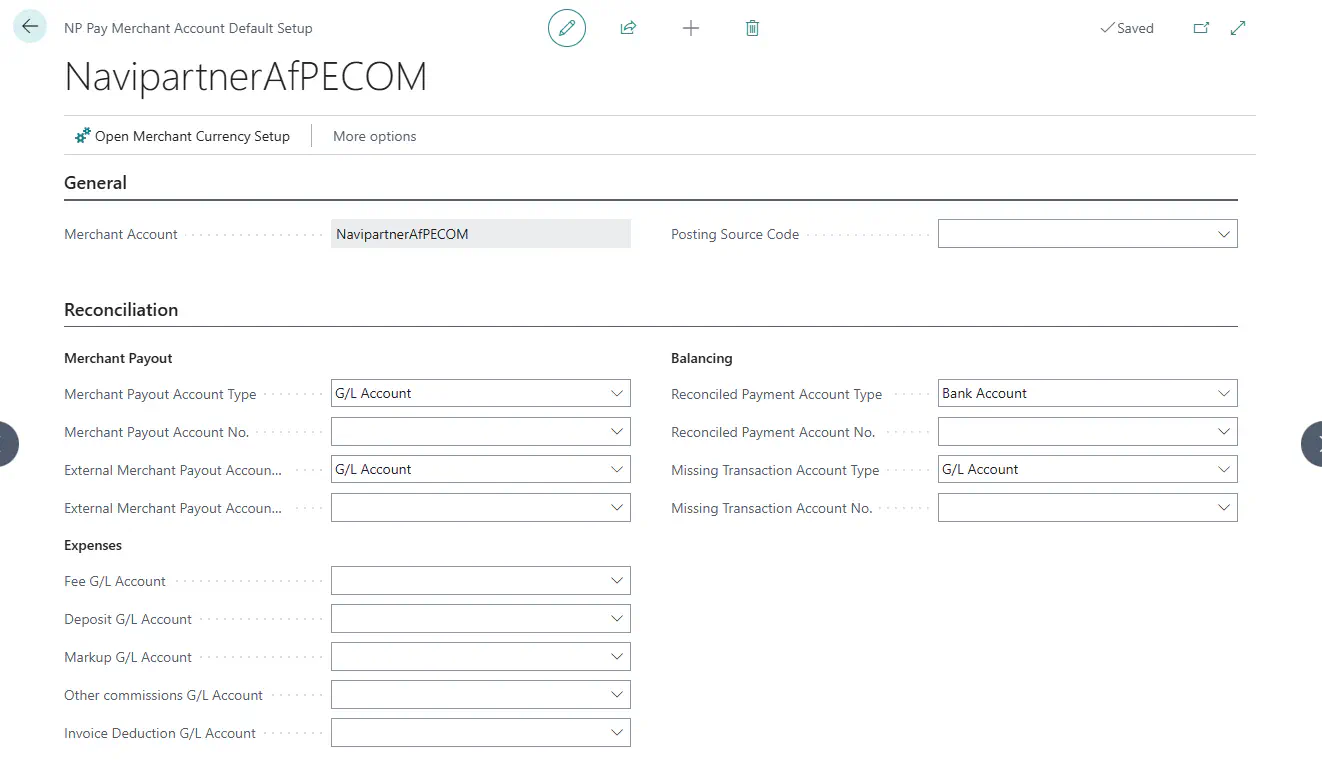
Assign the Posting Source Code.
Create/assign general ledger accounts for all journal types.
Merchant account setup – multiple payout currencies
The NP Pay Merchant Account Default Setup, opened from NP Pay Setup, works as the default configuration for reconciliation posting. This setup is applied when no currency-specific configuration is defined.
An action, Open Merchant Currency Setup, allows defining additional, currency-specific merchant account configurations.

Using Merchant Currency Setup, it is possible to specify a separate Reconciliation Account Type and Account No. per currency that exists in Business Central. These settings are maintained per merchant, allowing different merchants to have different account mappings for the same currency.

During reconciliation posting, the system applies the following logic:
It first looks for a matching combination of Merchant Account Name + Currency Code + Reconciliation Account Type in the Merchant Currency Setup.
If no matching record is found, the system falls back to the Default Merchant Account Setup.
This gives full flexibility to the user:
specific accounts can be configured only for selected reconciliation transaction types and currencies, while all remaining postings continue to use the default setup.
Example
A merchant processes transactions in DKK and EUR, where DKK is the LCY.
- The Default Setup is used for posting DKK transactions.
- For EUR transactions, the user creates Merchant Currency Setup lines for the required Reconciliation Account Types with Currency Code = EUR.
- As a result, EUR transactions are posted to the accounts defined in the Merchant Currency Setup, while DKK transactions continue to use the Default Setup.
It is also possible to fully replace the Default Setup by defining Merchant Currency Setup lines for all required currencies and reconciliation account types, including the LCY (for example, setting DKK as the NP Pay Currency Code).
However, the recommended approach is to keep the Default Setup filled for the LCY and use Merchant Currency Setup only for additional currencies.
Perform reconciliation
Once you’re done setting up NP Pay reconciliation, you can perform it by following the steps provided in this guide.