Make a sale on NP Retail Emergency mPOS
Use the NP Retail Emergency mPOS to process a transaction by adding items, selecting a payment method, and completing the sale. If the internet is unavailable, sales will sync automatically once connectivity is restored.
Prerequisite
- Make sure your device of choice is properly set up.
For more information on devices, refer to the feature overview.
Procedure
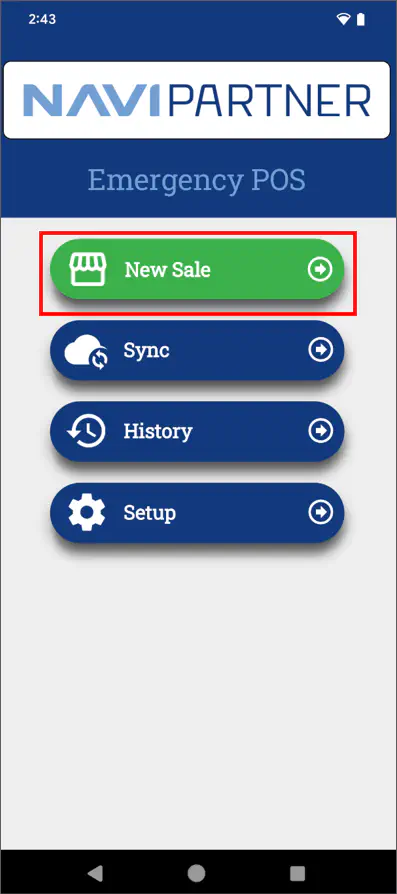
Open the NP Retail Emergency mPOS app on your device.
The home screen is displayed.If unsynchronized sales exist, you’ll be prompted to sync them.Tap New Sale
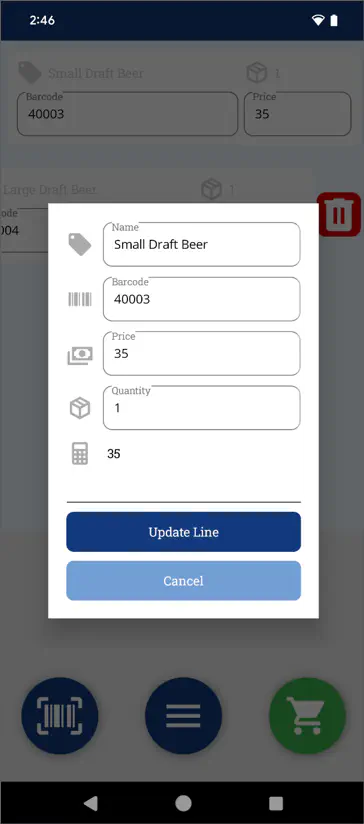
Scan or add items manually.
(Optional) If needed, edit or remove lines with the buttons that appear from swiping the item to the right and left respectively.
Tap the Cart icon to proceed to payment.
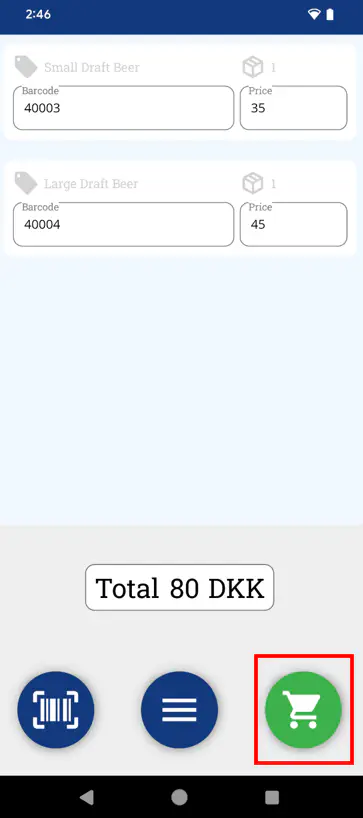
Choose a payment method and complete the transaction.
If the sufficient amount has been paid, the End of Sale pop-up window is displayed.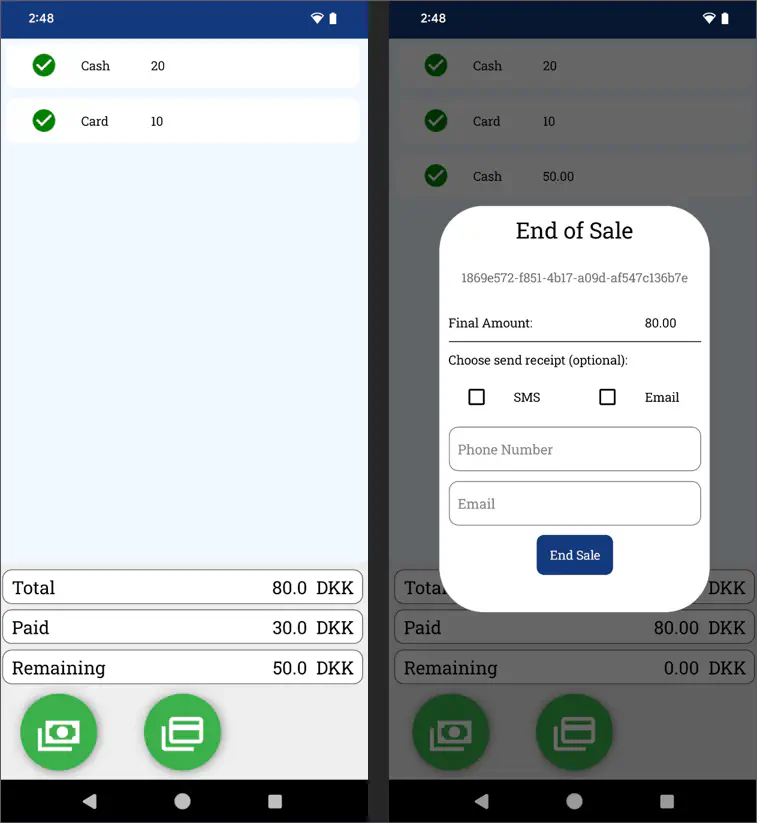
Provide the customer’s phone number and email, and tick the checkbox next to the preferred receipt format (SMS or Email).
The customer will get the receipt after the sale is synchronized to Business Central and the next job queue is resolved.Tap End Sale.
The sale is finished and you are redirected back to the home screen.
Checking sale history
If you wish, you can access History to view past transactions.
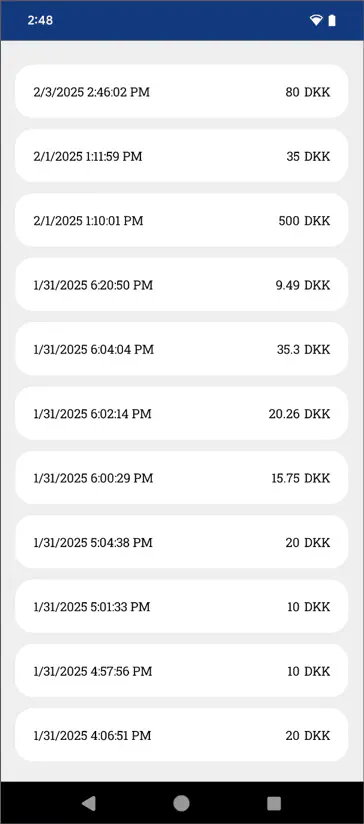
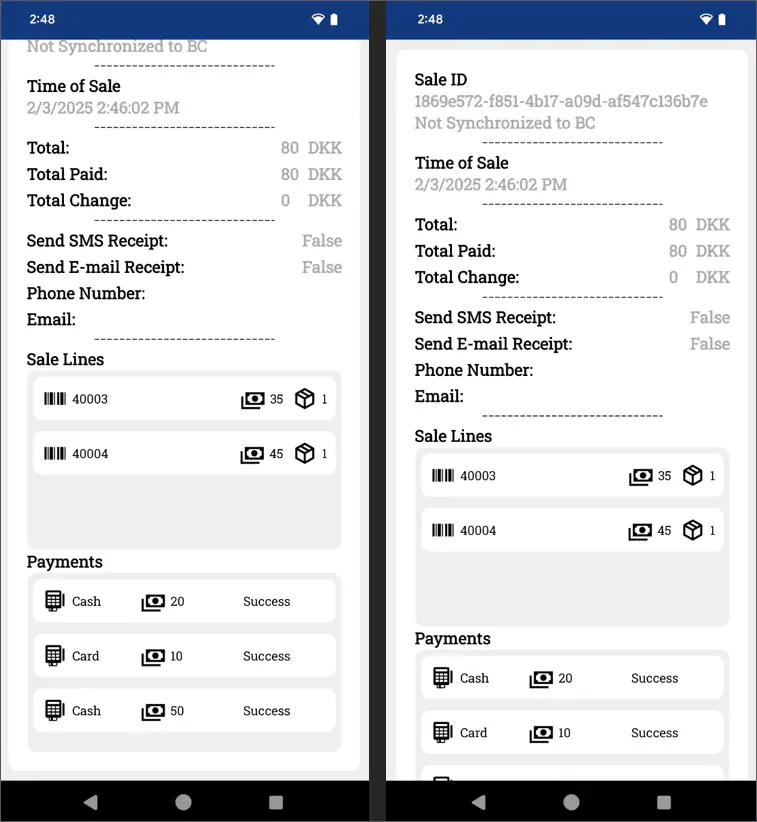
Tap a sale to see details.
Troubleshooting and support
If needed, use the Help page to view logs and troubleshoot errors.
Error and crash events are automatically collected, but enabling the Logs feature extends the info written to a local file.Upload logs for developer review if issues persist.
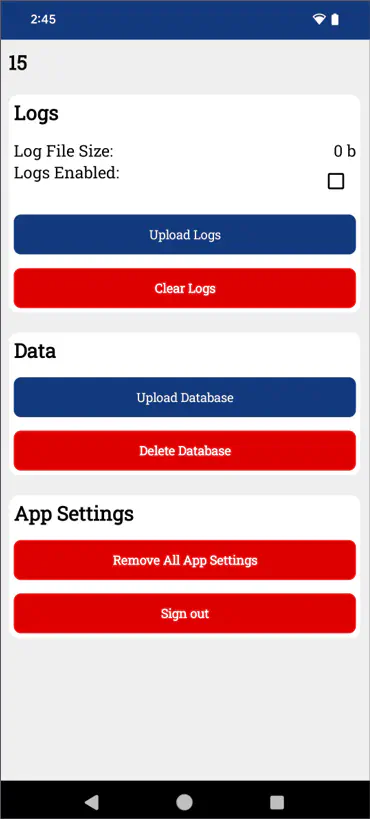 Be cautious when using Delete Database — this action is irreversible.