Set up fiscalization compliance - Norway
This article details how to configure NP Retail for compliance with Norwegian fiscal laws.
Go to POS Audit Profiles page, enable the audit log, and set the Audit Handler to NO_LOVDATA.
Audit Log is used for recording all POS unit activities - drawer opening, salesperson sign-in, sale transactions, initial receipt prints etc.Make sure this audit profile is set for all POS units from the POS Unit List.
Enable the fiscalization compliance with Norway by activating the Enable NO Fiscalisation toggle switch on the NO Tax Fiscalization Setup page.
Reach out to NaviPartner for a self-signed certificate that contains a proper algorithm, that is specific to your customer.
Move to the Sign Certificate panel, and click Upload Certificate.
Move on to the SAF-T Cash panel, and populate the available fields with additional information for exporting an XML file to the SAF-T POS unit.
- SAF-T Contact No. – choose the contact person.
- Not Applicable VAT Code – choose the VAT code that is used for VAT business and product combinations that don’t have the assigned VAT codes when exporting the transaction data with those posting group combinations.
Click VAT Posting Setup Mapping, and on the VAT Post Group Mapper List page, create an entry for each combination of the VAT product and VAT business posting groups.
Codes are set in order to fulfill law regulations when posting sales and purchase documents. All codes are listed on the VAT Codes table.
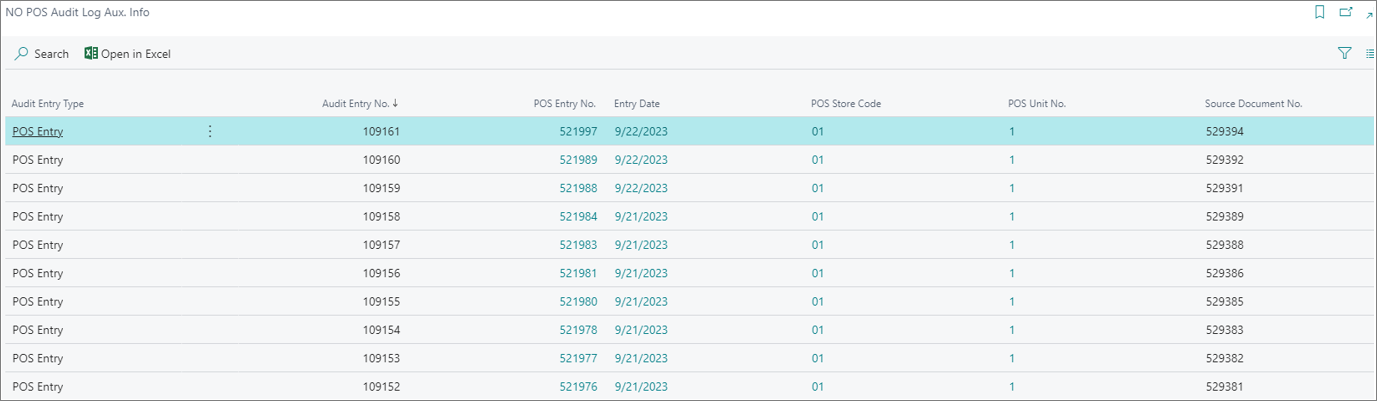
The VAT codes that are defined by Norwegian fiscal laws are linked to VAT Business and Product combinations.Once the fiscalization compliance with Norwegian laws is set up, you can find the information on all issued receipts from all POS stores and POS units in the NO POS Audit Log Aux. Info.
Next steps - digital signatures and subsequent signing transactions
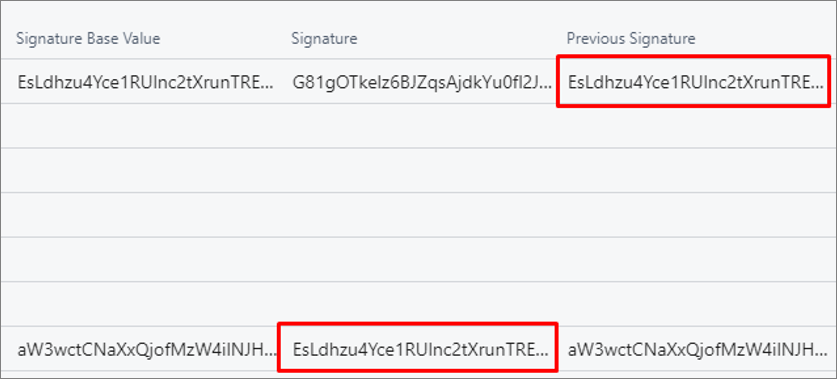
The signature base value is used as a base for encryption, and it contains the time, date, and the number of the receipt, as well as the amount including and excluding the VAT. The last two digits are decimals – in this case the amount including VAT is 65,00 and the amount excluding VAT 52,00.

The actual digital signature is the encrypted combination of the signature base value and the signature from the previously issued receipt.
Subsequent signing is required for transactions that aren’t yet signed.
- For subsequent signing, run the codeunit NPR NO Re-gen. Audit Signature - 6060013 which can be found in the Object List.
A pop-up window is displayed, and you’re prompted to choose whether you wish to recreate all transactions for signing or not. - Select Recreate all transactions for signing.
All transactions from the POS Entry List are transferred (recreated if they were already available in the Audit Log), and signed in the POS Audit Log. This process may take up to a couple of hours to be completed.
If some POS entries were already signed, they will be recreated and resigned as well, and the previous signatures will be deleted.
Next steps - export transaction and master data from SAF-T Cash Register
Navigate to the SAF-T Cash Register Export administrative section.
Request data export by clicking New.
A page for setting the start/end dates of the data recording and export options is displayed. The following options are available:- Mapping Range Code – the unique code with which the given data export will be listed and recognized by the system.
- Starting Date – transactions made from this date will be exported.
- Ending Date – transactions made until this date will be exported.
Click Start to begin data export.
When the Parallel Processing is off, a pop-up window is displayed to check whether you wish to initiate the process.Click Yes to begin the export.
When exporting is finished, the information about the exported content is displayed in the Lines tab.
All transactions are recorded in the POS Entry List, and all cash register activities in the POS Audit Log table.Click the last entry in the SAF-T Cash Register Export Zips list, and then Download ZIP File.
The ZIP file with the latest data is downloaded to your computer.
The file contains two master data files - one that contains Transactions & Events, and the one that doesn’t.If you restart the export for the existing export files, new File No.-s will be displayed in the table for downloading files for each new export.
Next steps - Z report
The end-of-day report (Z report) needs to be released at the end of the shift when no more sales will be done for that day. Z report is automatically printed after the balancing process is done. All Z reports are recorded on the Workshift Summary page.
On POS Entry List all POS entries are available, including the Z report entries. Z report entries have Balancing set as their Entry Type, which sets them apart from other entries.
You can print the report from this page by choosing the Print Entry action from the Report section.