Use the NP Designer
This article provides an overview of the NP Designer application, including guidance on ticket design and configuration.
NP Designer is a dedicated application for creating and customizing ticket layouts within Microsoft Dynamics 365 Business Central. It enables users to design visually consistent tickets using configurable elements, manage multiple templates for various use cases, and ensure alignment with both operational needs and branding standards.
Sign up
To access the NP Designer application, only the user’s email address is required for login. These steps should be followed:
-
Step 1: Enter your email address and click Next.
-
Step 2: Check your inbox for a one-time code, enter it, and click Login.
Note: If the email is associated with a registered user, access will be granted automatically, and you will be redirected to the main page of the application – Designs.
Designs
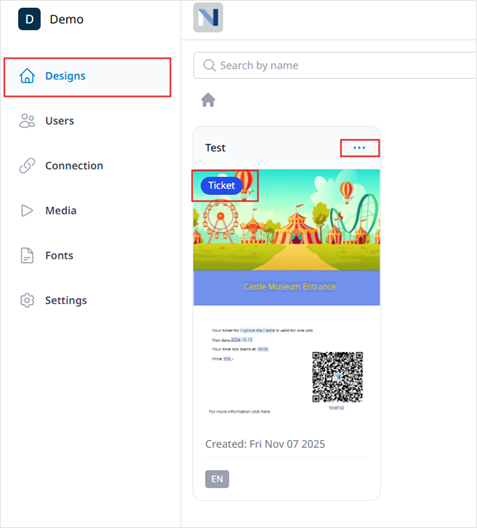
The Designs page is the main workspace in NP Designer, where users create and manage ticket layouts. New tickets can be started from a blank design or by duplicating an existing one. All designs are shown as cards with a preview, name, creation date, and language. Users can add new designs via the Add new design button, or organize them into folders using Add new folder.
When creating a new design in NP Designer, the user can choose the design type: Ticket, Voucher, Coupon, Membership or Attraction Wallet. When creating designs, it’s important to select the appropriate design type. The available types are now retrieved directly from Business Central, ensuring that users always choose from accurate and up-to-date options.
The manifest link generated in the email allows recipients to access the voucher design as intended. To ensure proper functionality of vouchers with SendGrid and the Designer, it is important to enable Manifest on the NP Designer Setup Card in Business Central.
After the design is created, it is automatically marked with the selected type, making it easy to identify and manage within the system.
Each design card also includes an options menu where users can delete, duplicate, and see the history of changes or rename designs.
Ticket creation
The Designs page provides a canvas for creating and customizing ticket layouts, supported by intuitive tools for flexible design. At the top, users can name the design and set the language, while changes can be saved anytime using the Save button.
On the left side of the editor, a toolbar gives access to design elements such as text, images, shapes, and QR or barcodes. Elements are added by dragging them onto the layout, where they can be positioned and resized.
Toolbar
When a QR code is added to the design, clicking the ![]() button allows the user to modify it. For example, add a URL, insert a logo in the center, and customize the QR code’s appearance.
button allows the user to modify it. For example, add a URL, insert a logo in the center, and customize the QR code’s appearance.
The editor is designed to give full creative control while maintaining clarity and structure, making it easy to build visually consistent and print-ready ticket designs tailored to specific events or venues.
Dynamic text fields
Within the NP Designer, text boxes support the use of dynamic fields, allowing users to insert live data directly from Business Central.
By typing {{ inside a text box, a drop-down list of available fields appears. From this list, you can select the desired field to automatically display corresponding data in the design. These dynamic fields are linked to the related ticket in Business Central and can include information such as the given price, selected date, customer details, or other relevant ticket data.
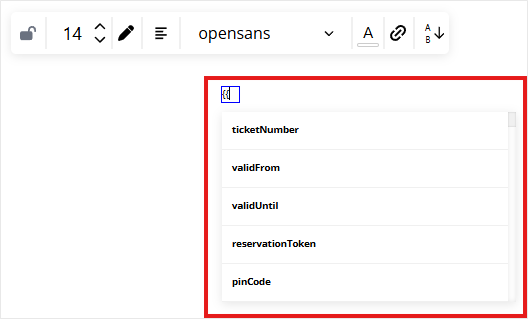
Using dynamic fields ensures that all generated designs display accurate and up-to-date information retrieved directly from Business Central.
Tip: For a comprehensive list of all fields that can be retrieved, please refer to this API.
Example
Users
The Users page lists all registered users with their details and permissions. Administrators can add, edit, or remove users via the Add new user button or the action menu, and quickly find entries using the search bar.
Connection
The Connection page is set up by a NaviPartner employee, while the description is provided solely to familiarize the customer with the process, explaining the tenant ID, environment, company, and the auto-generated API key that must be inserted into the NPDesigner Setup in Business Central.
Fonts
The Fonts page allows users to view and manage all fonts available within the system. Each font is listed by name, with a live Preview displaying how the typeface appears in both regular and bold styles. A search bar at the top enables users to quickly find specific fonts by name. New fonts can be added by clicking the Add new font button in the top-right corner of the page.
-
Note: Only TrueType (.ttf) font files can be uploaded.
Medias
The Medias page serves as a central library for all image assets used in ticket designs, such as logos and backgrounds. Media files can be added or removed as needed and are available for direct use within the design interface.
Settings
The Settings page contains the Organization Settings section, which includes Date Settings for configuring how dates are displayed across the organization. This global setting ensures that all users see dates in a consistent format throughout the system.
In the Date Format field, user can define the preferred date format using standard format tokens and preview the result before saving. Below the main setting, the Format Tokens section explains the available tokens, while Format Examples provides common combinations with sample outputs for reference.
Once the desired format is selected, click Save Settings to apply the changes.
Business Central
After a successful connection, the integration between NP Designer and the Business Central environment is established, and the user can access the Business Central side for ticket usage.
NPDesigner Setup Card
The NPDesigner Setup page serves as the place for configuring the integration between NP Designer and Business Central. On this page, the URL of the NP Designer application is entered, along with the API key generated by the application. The fields Public Ticket URL and Public Order URL are prepopulated and do not require manual input.
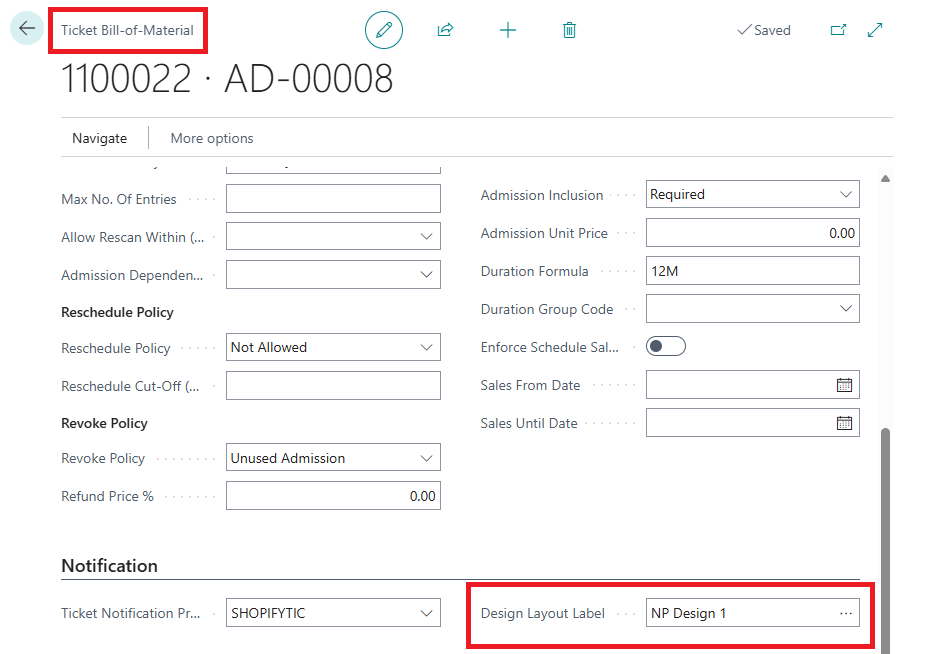
Ticket Bill-of Material (BOM)
On the Ticket Bill-of-Material page, the Design layout label field is defined. This is where the user specifies which NP Designer layout will be applied, ensuring that the correct label format is used whenever tickets are generated.
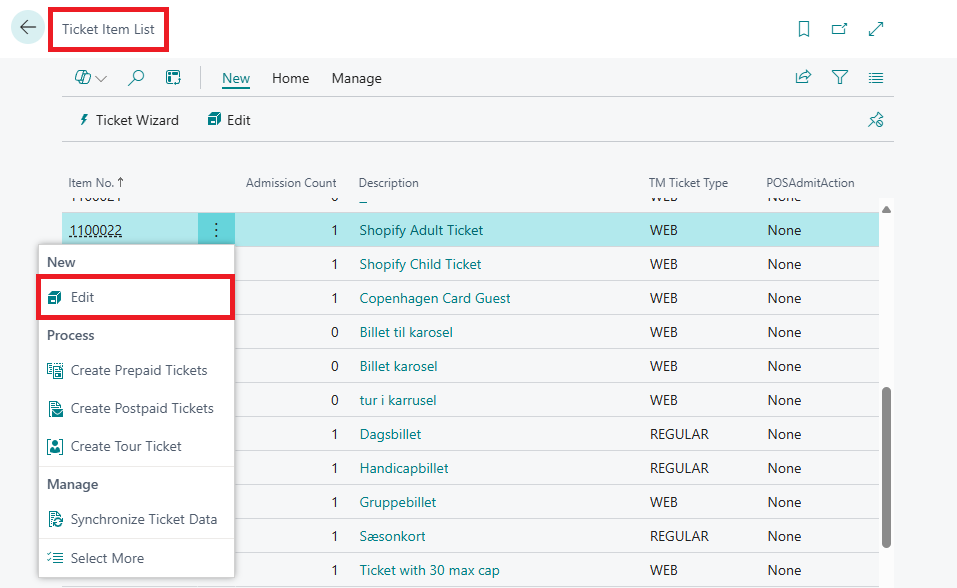
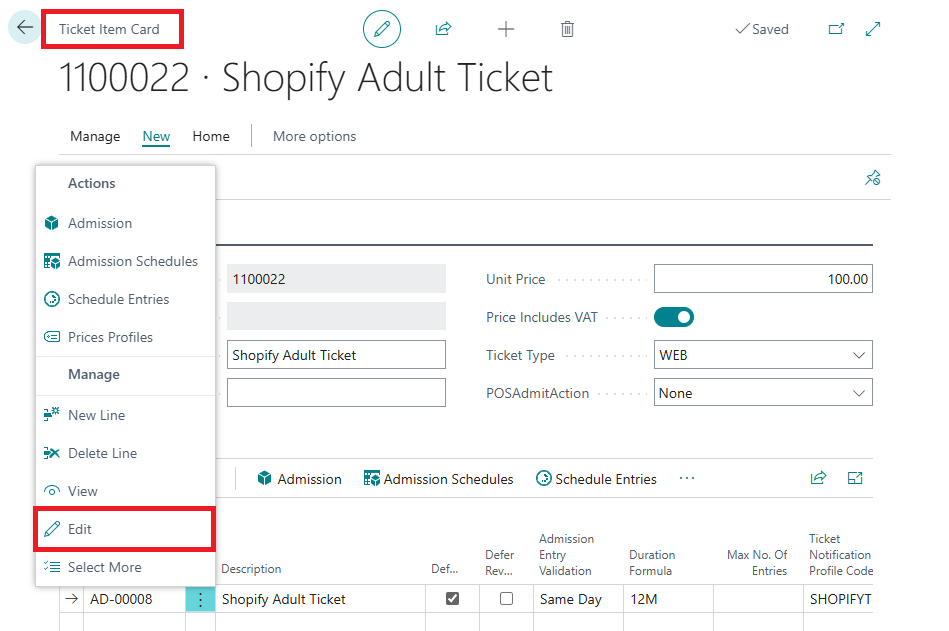
To open the Ticket Bill-of-Material, these steps should be followed:
- Step 1: Go to Ticket Item List.
- Step 2: Select a Ticket Item Card.
- Step 3: From there, navigate to Ticket Bill of Material.
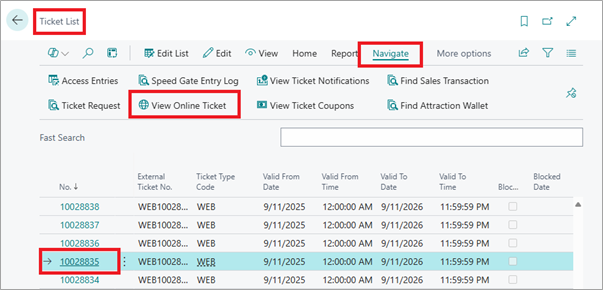
Ticket List
The Ticket List page is designed to display all available tickets within the system. In addition to providing an overview of ticket information, it allows users to preview any selected ticket in its digital format through the View Online Ticket action.